If you’re planning to visit India, it’s very likely that you’ll need to apply and obtain a visa before your arrival. Thankfully, this process can be easily done online.
In this post, I’ll detail how to apply for this e-Visa through the official website made by the Indian government. Don’t trust any other website when they say they’ll get you the visa! They’re likely a third-party website that will charge you extra, or worse, steal your identity.
Who is eligible for India e-Visa?
Only people of certain nationalities and traveling with passports from those countries can use the e-Visa to enter India. You also need a passport with at least 6 months of validity.
Additionally, you can only arrive using an e-Visa at certain airports and seaports in India
➡️ Nationality Eligibility: Check the list of eligible nationalities and double-check the Authorized Immigration Checkposts here. Make sure you’re going through one of those checkposts to enter India!
How much does India e-Visa cost?
The cost differs depending on your purpose of visit – whether it’s Business, Medical, Conference, etc. For tourists, the cost is as follows:
- 30 days: US$10 (April to June), US$25 (July to March)
- 1 year: US$40
- 5 years: US$80
When paying online, there will be some fees added, but the amount was just a few cents ($0.63 to be exact).
When should I apply for India e-Visa?
The e-Visa processing takes 72 hours, so tourists should apply at least 4 days before their date of arrival.
In my experience, I was only able to apply for my tourist visa one month before the intended date of arrival, because I was applying for a 30-day e-Visa. If you’re applying for a 1-year or 5-year visa, you could apply 4 months in advance.
However, I do not recommend applying as soon as the window to apply opens for your date of arrival. This is because the e-Visa expires in a month as well.
So for example, I am traveling to India on 25 August. I applied for the visa on 26 July, as soon as the window opens to apply for a visa for arrival of 25 August. However when I received my e-Visa, to my dismay, it stated that the travel authorization will expire on 25 August. This means if something changes with my plan and I need to delay the flight by even just one day, I would need to re-apply for the visa again. It would have been better to apply a few days later ad it would give me some travel flexibility.
Where can I apply for India e-Visa online?
➡️ Apply for the India e-Visa here. Click on the “Apply here for e-Visa” button at the bottom of the page
This is the OFFICIAL, ONE AND ONLY, DIRECT website of the Indian government immigration. Don’t use any other link! There are some third-party agents out there posing as the official website, but they’ll just scam you by charging you more, or worse, they might steal your identity.

How can I apply for India e-Visa?
If you qualify for India e-Visa, Here is the step-by-step on how you can get your India e-Visa online:
1. Prepare the required documents
There are two required documents you need to prepare for your application:
- Colored Photo – Applicant’s recent colored photograph with the following specifications
- Format: JPEG
- Size: Minimum 10 KB, Maximum 1 MB
- Minimum dimensions: 350 px by 350 px
- Do not simply crop the Passport Image to use it as your recent photograph. Upload a clear, front-facing photograph with a preferably white or light-colored background.
- Copy of Passport page containing personal particulars
- Format: It has to be PDF, not any other format
2. Apply for your visa at the India e-Visa official website
➡️ Apply for the India e-Visa here
Click on the “Apply here for e-Visa” button at the bottom of the page, and you’ll be able to start your application right away.
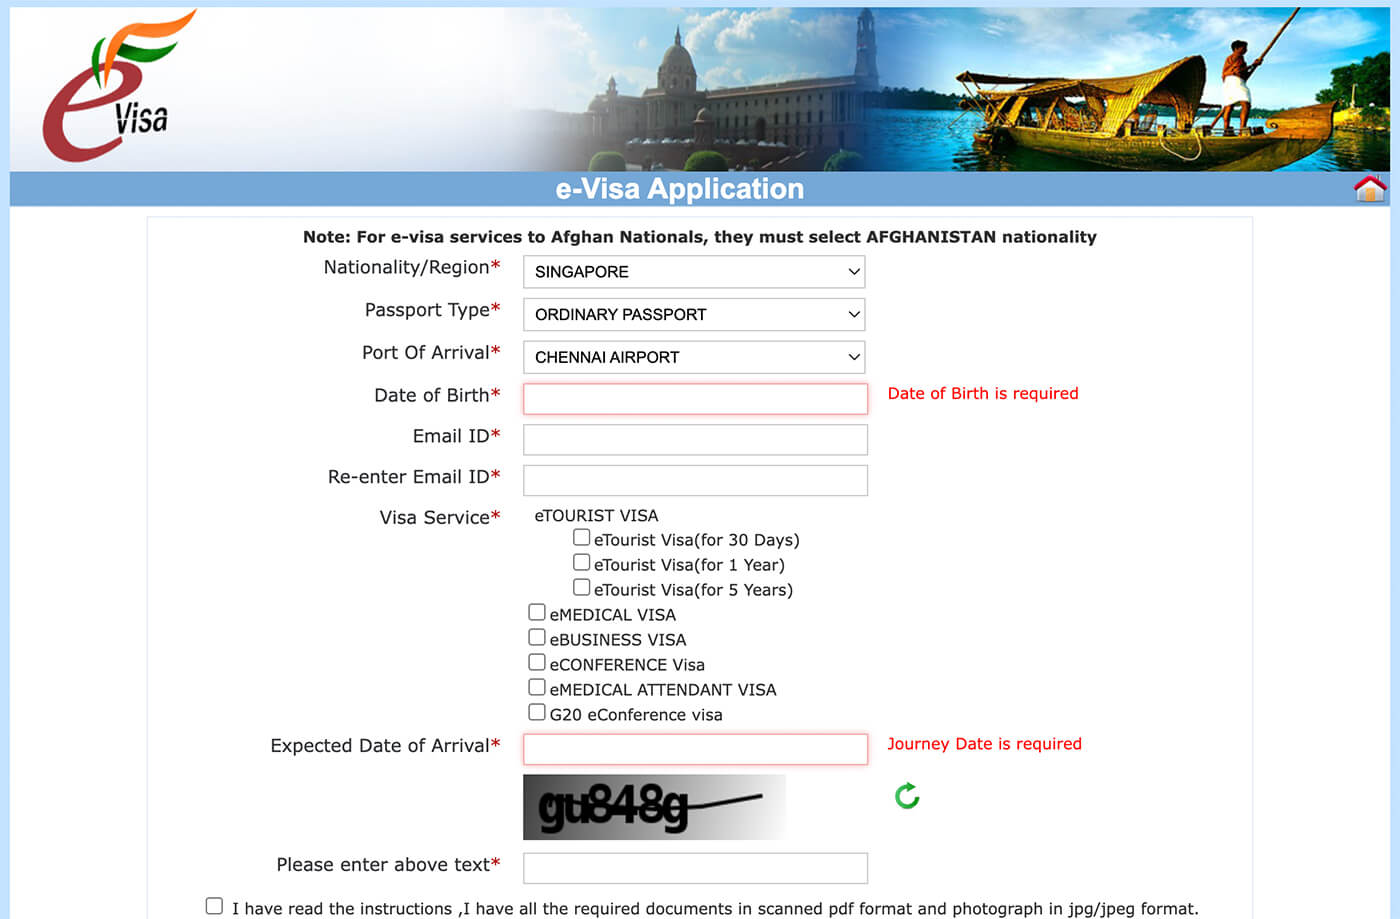
3. Fill out the e-Visa application form
The visa application form is pretty straightforward for the most part, but it is very long and thorough. Once you have started the application, note down the Application ID at the top right-hand corner of your application. This will also be emailed to you. You might need to resume your application later on, and you can simply resume where you left off by providing the Application ID.
Visible identification mark – this refers to any marks (scars, birthmarks) you might have that can be seen prominently, usually on your face. I put “none” for mine.
Educational level – this one stumped me because the application used very different terms than what I am familiar with. But here is the complete list of what each one meant:
- Below Matriculation – has not studied beyond 10th grade
- Graduate – university or college-level education
- Higher secondary – high school education
- Illiterate – no education
- Matriculation – 10th-grade level education
- Postgraduate – beyond university or college level.
- Professional – technical/professional training or certification
SAARC Countries – refers to Afghanistan, Bangladesh, Bhutan, India, Maldives, Nepal, Pakistan, and Sri-Lanka
3. Make payment for your e-Visa application
This step was quite straightforward for me. You can pay via a credit card or PayPal. If you’re concerned about your credit card detail, you can look into getting a Wise digital card.
4. Receive your Electronic Travel Authorization (ETA)
Officially it takes 72 hours of processing time to get your visa. The visa approval will be emailed to the email you have indicated at the beginning of your application.
In my case, it took only 20 hours before I got my e-visa approved and the ETA was emailed to me.
5. Confirm that your ETA status is shown as “granted” on the website
Go back to the e-Visa website and click on “Check your visa status”. You’ll need to input your application ID and passport number. This will let you download a more official-looking PDF (moreso than the email) that should show your status as “granted” and can be printed if need be.
And that’s all I know about the India e-Visa application process! I hope it helps, and as usual please feel free to leave comments below.