Kamikochi is part of the Chubu Sangaku National Park, also known as the Northern Japanese alps. It has also been referred to as the “Japanese Yosemite Valley”, due to similarity of the terrains that can be found there.
Kamikochi is written as 上高地 in Kanji, which gives an insight to its literal meaning “the place where gods descended”, or simplified to “the highlands”.
Kamikochi is a popular starting point for those who are looking to tackle the Japanese Alps. It is also popular with day trippers who just want to see and appreciate the natural beauty in Kamikochi.
I visited Kamikochi on the first week of October and did a 2 days trek there. When I posted stories about my trek on Instagram, I received messages from many of you asking me to write a blog post about this trek, so here you go! 😀 This is everything I know about hiking and planning your trip to Kamikochi.
It’s going to be a long one, so buckle up! Here’s a summary of topic to help you navigate:
- When is the best time to visit Kamikochi?
- How to get to Kamikochi
- Is Kamikochi doable as a day trip?
- What to pack for trekking in Kamikochi
- General Tips for visiting Kamikochi
- Where to stay in Kamikochi
- Karasawa Cirque Trek Itinerary Options
- What the route was like and what to expect on Karasawa Cirque
- Anything else I need to know about Trekking in Kamikochi?
When is the best time to visit Kamikochi?
Kamikochi is open from 15 April to 15 November. Some facilities such as the mountain lodge may also be closed earlier. You will need to check their official website at kamikochi.org for exact dates. The park closes down for winter and you cannot visit it without a guided tour.
When it’s open, Kamikochi is popular all year round but the most popular time is perhaps in mid-October because that’s when you can expect peak Autumn foliage time. You will be able to see the park in all its colorful glory! Keep an eye on the weather report at the official Kamikochi website for more information. It will include some Autumn foliage reports since it is a big deal in Japan.
How to get to Kamikochi
One of the main features of Kamikochi is that it is a car-less national park. While private cars cannot access the Kamikochi area, thankfully a lot has been done to make it as accessible as possible.
Here are ways that Kamikochi can be easily reached from many cities in Japan:
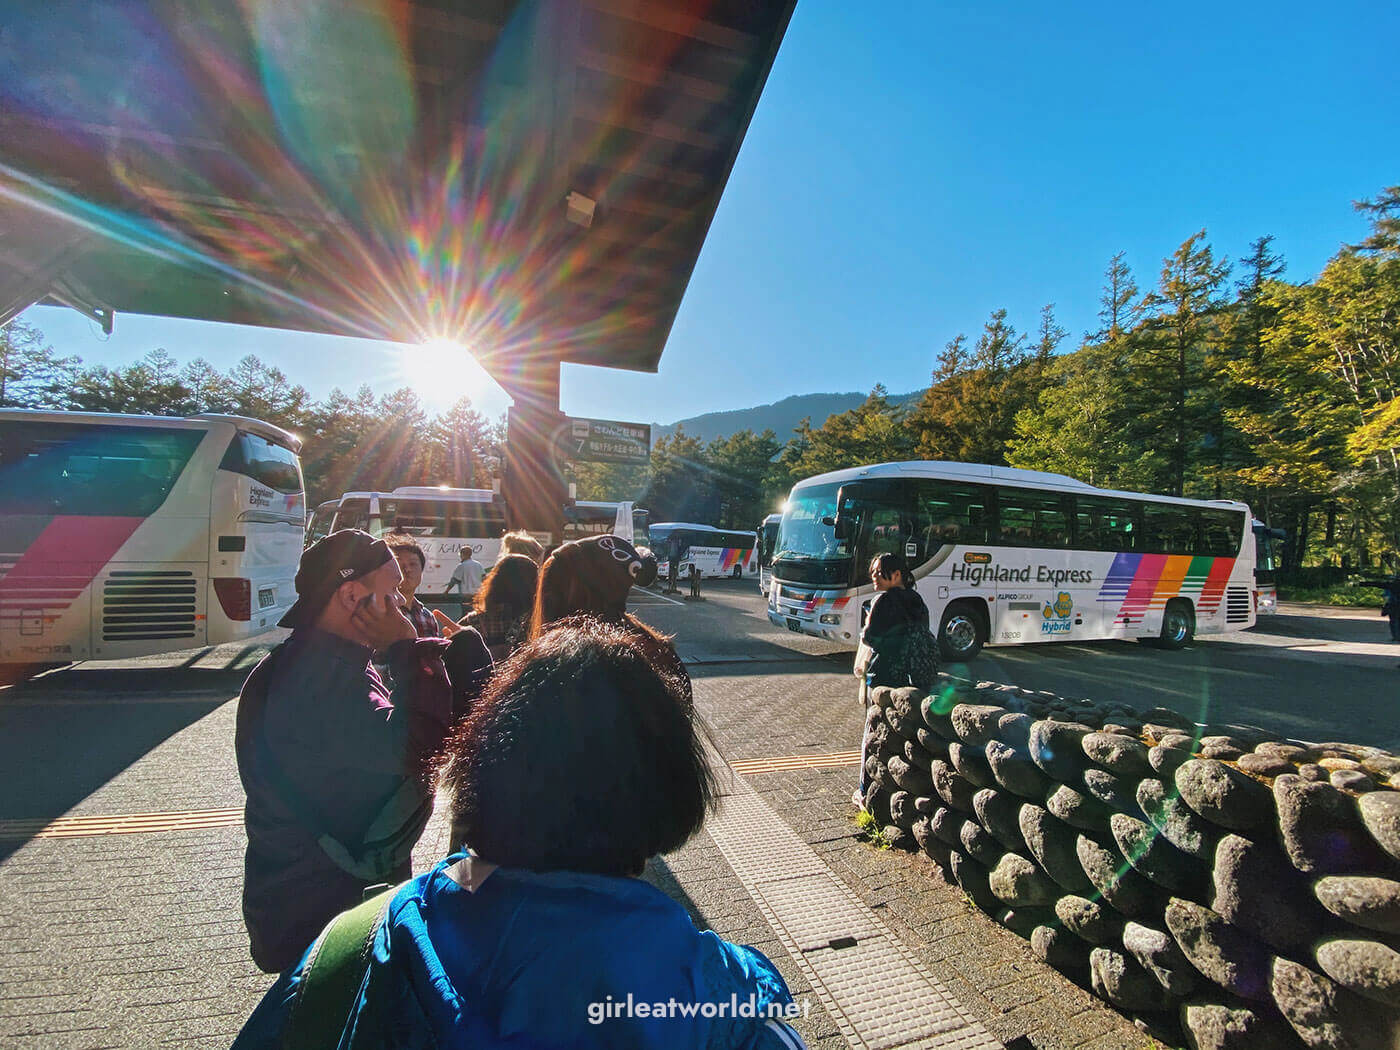
1. How to get to Kamikochi By Bus
- Direct Buses from major cities – There are direct express buses from major cities like Tokyo, Nagano, or Osaka / Kyoto. This is ideal if you’re flying into Japan via one of the major cities and not interested in seeing other things around Kamikochi. The bus takes about 5-7 hours from Tokyo / Osaka / Kyoto (can be taken overnight), or 2-3 hours from Nagano. Click here for more information on these express buses.
- From Matsumoto or Takayama – There are also shuttle buses from nearby mountain cities like Matsumoto and Takayama. This is ideal for those who want to explore a bit more of the area before going to Kamikochi. You can take the JR train to Matsumoto or Takayama, and then switch to the bus from there.
- From Matsumoto – Take the train to Shin-Shimashima Station. From there, take the bus to Kamikochi. Click here for the timetable. Take note that if you plan to go back to Matsumoto, you must take a numbered ticket at the Kamikochi station – do this as soon as you get off the bus!
- From Takayama – Take the bus to Hirayu Onsen Bus Terminal and board Nohi bus to Kamikochi. Click here for the timetable. You can pre-purchase the bus ticket here for a cheaper price.
2. How to get to Kamikochi with a Private / Rental Car
Personally, I think the best way to access Kamikochi is to incorporate it into a road trip, which is what we did. My husband and I took a car from Tokyo and stopped by Karuizawa and Matsumoto before heading into Kamikochi (click here to read about our road trip through Nagano)
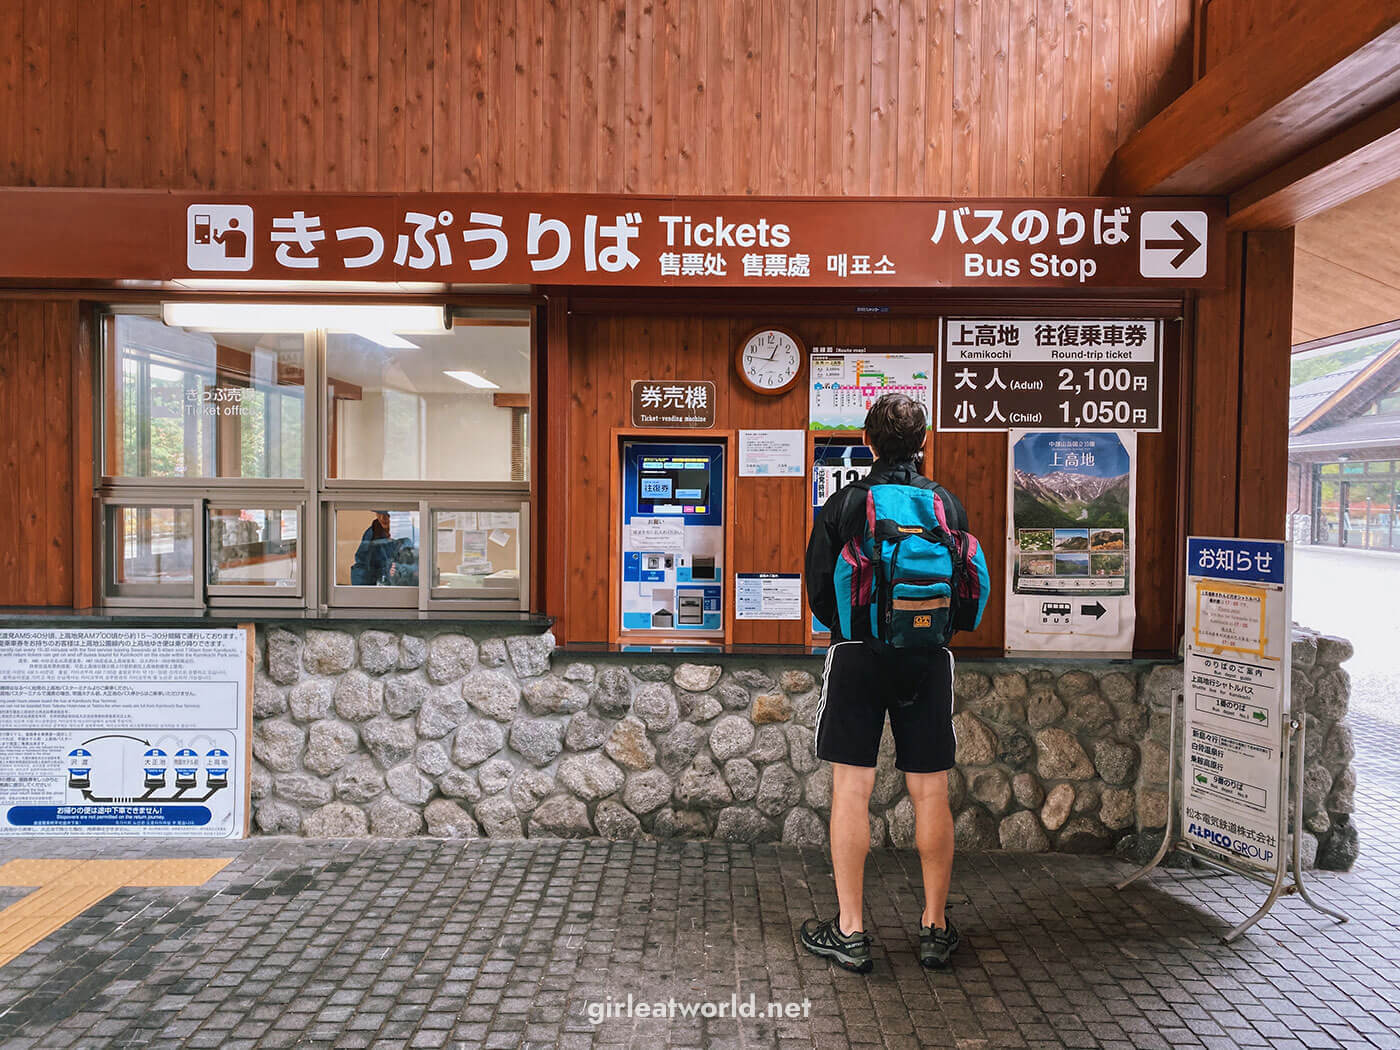
You can only drive your car as far as Sawando Bus Terminal. Private cars are not allowed to enter Kamikochi past this point. At the bus terminal, you can park your car for 600 yen per 24 hours and take the bus to Kamikochi, which costs 2150 yen round trip per adult. The ticket can’t be pre-booked, but it usually does not run out even during the busy season. The bus leaves every 30 minutes from Sawando and takes about 30 minutes to reach Kamikochi, making a few short stops between.
Click here for the Sawando – Kamikochi shuttle bus timetable. Take note of the timing for the last bus leaving from Kamikochi (usually at 5:05PM but please double check) and make sure you don’t miss that bus on the way out, or else you’ll have to take the taxi for 3500 yen one way. If you are there during peak season, I recommend lining up 10-15 minutes before departure, as they do get filled up rather quickly.
Also take note that if you’re travelling in a group of 3 or more, it might actually make more sense to take the taxi from Sawando since the price is 3500 yen one way, which comes up to about the same as the bus. Make sure you have enough room for your backpacks though!
Is Kamikochi doable as a day trip?
Yes! Kamikochi is definitely doable as a day trip, if you aren’t looking for a long trek. There are still plenty of things to do around the Kamikochi station itself and most of the beautiful sights are actual near the station.
To visit Kamikochi as a day trip, You can base yourself in Matsumoto or Takayama and take one of the first shuttle buses to Kamikochi, then leave on the afternoon bus.
PS: Make sure to take numbered ticket for the later bus back if you’re going to Matsumoto! And make sure to note down the timing for the last bus so you don’t get stuck in the park. Generally speaking, you should aim to get to Kamikochi by 7AM and leave by 3PM.
If you decide to do Kamikochi as a day trip, you can get off at the Taisho Pond station, two stations before Kamikochi station. You can then check out Taisho Pond and walk along the river for 40 minutes to Kamikochi station, where you can go on to check out Kappabashi. From there, Myojin pond and Hotaka Inner Shrine is about 2-3 hours round trip from Kamikochi station. This should keep you busy for 4-5 hours before you head back to the cities.
What to pack for trekking in Kamikochi
Kamikochi trek is a pretty easy trek. However, you should still be prepared! Here are things I recommend to pack:
- Windbreaker – It can get quite windy and cold here, even in the summer months.
- Rain Gears – If you’re expecting a rainy day, bring rain gears that will help make your trip easier – such as ponchos and backpack cover.
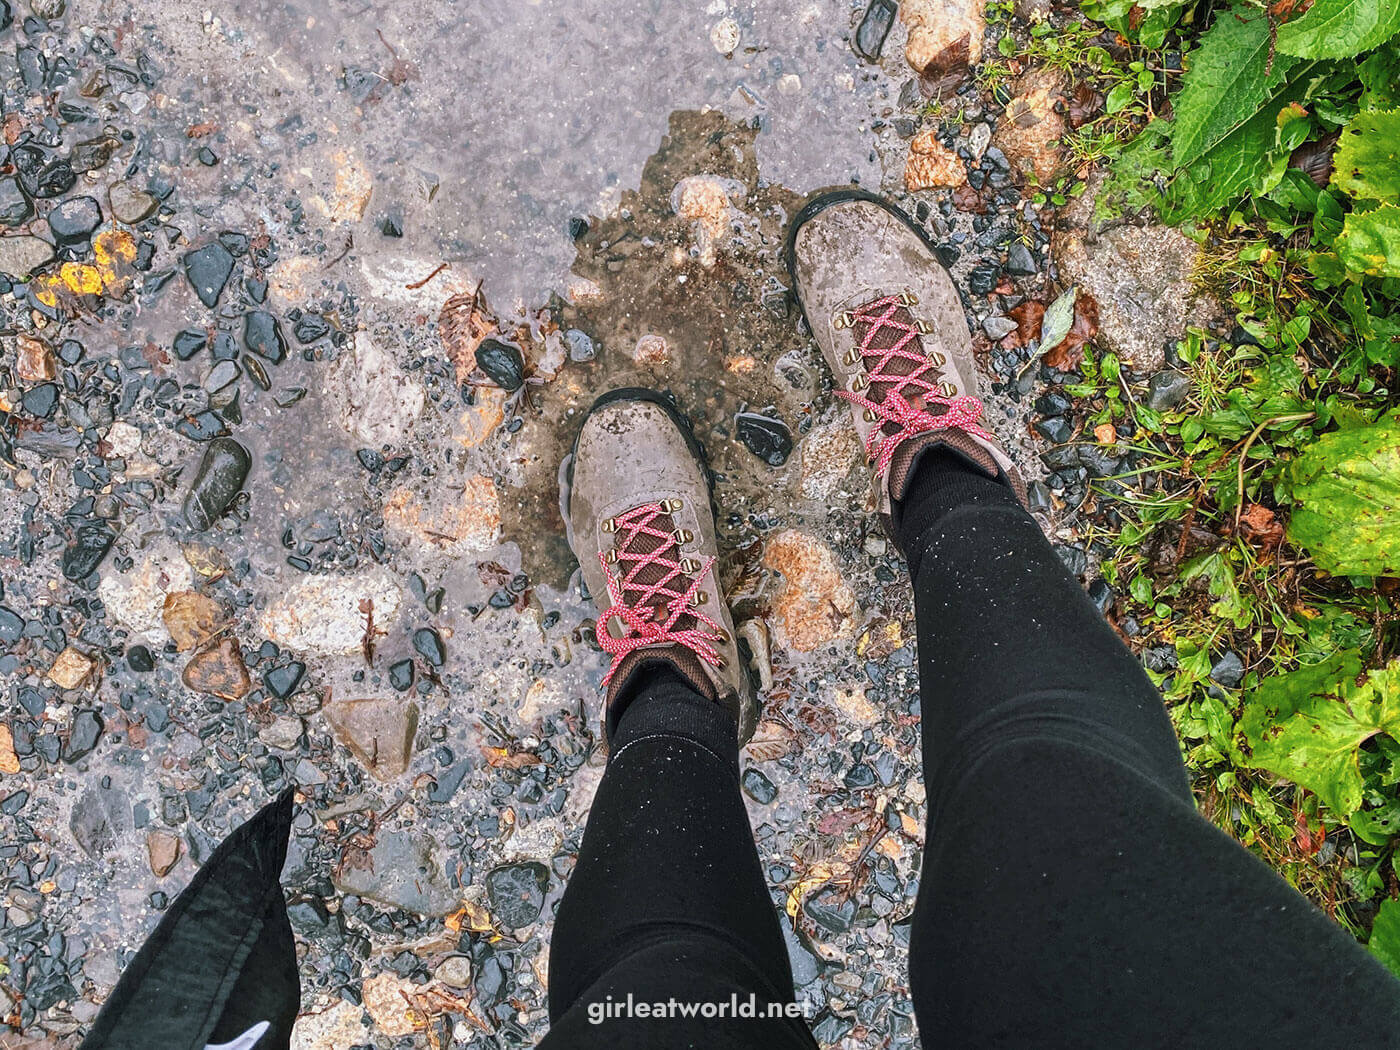
- Hiking shoes – Definitely important as it can get muddy and slippery on some parts of the trail. Wearing sneakers is not ideal.
- Snacks – bring snacks that are more dense in calories, such as nuts and power bars. Chocolates are great too!
- Water Bottles – To minimize trash (see the Trash in Trash out portion below), bring reusable water bottles. You can refill these at the lodges.
- Cash – Due to limited connectivity, everything past the Kamikochi station is cash only. So if you’re planning to stay in the lodge, bring enough cash to cover your stays and then some for meals and emergencies.
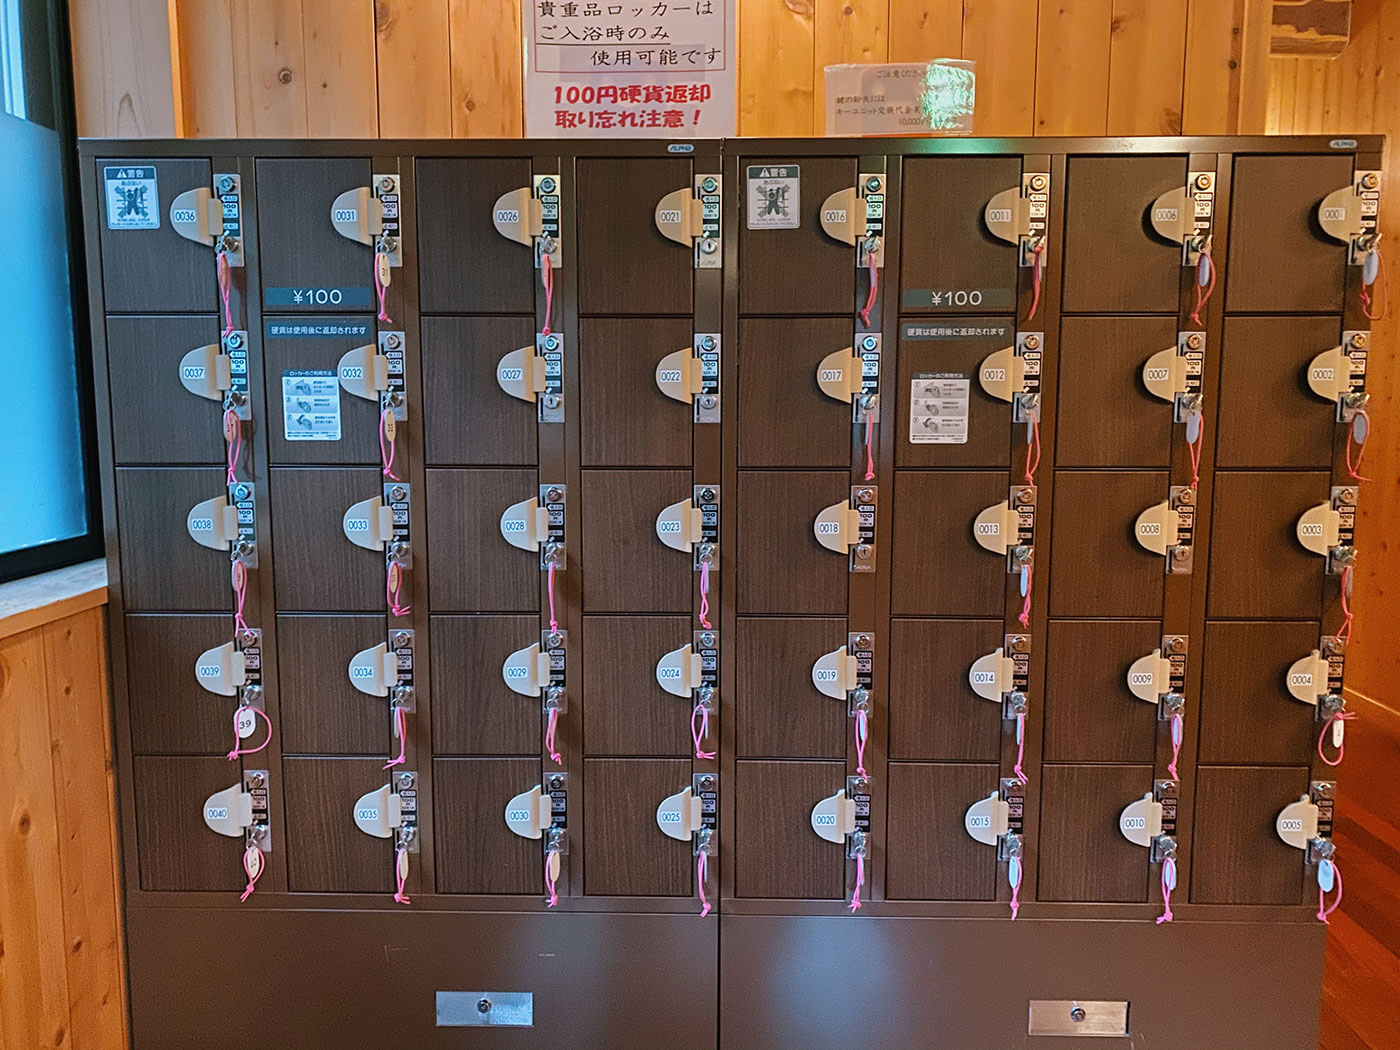
- 100 yen coins – You’ll need this for lockers, toilets, etc. Nearly all toilets and lockers I see in Kamikochi asked for 100 yen donation for maintaining the eco toilet.
- (Optional) Bells – Many Japanese hikers chose to have bells on them to scare the bears away. Yes, there are black bears in Kamikochi, but you don’t need to be scared of them since they are timid and actually avoid humans. The bell’s purpose to help discourage them from approaching you.
- (Optional) Trekking Pole – For those who are planning to do a long trek, carrying a pole might help. I saw tons of hikers with poles especially those going to Karasawa Hyutte.
General Tips for Visiting Kamikochi
Opening Hours – The Kamikochi gate closes at 7pm, so make sure you don’t arrive later than that unless you intend to stay overnight in Kamikochi.
Trash in, trash out – Whatever trash you bring in, you have to take your trash back with you. No, there are no trash bins on the trails. Be strategic about what snacks and drinks you bring in – opt for snacks that are more dense in calories (so you can bring less of it) with packaging that are compact / can be folded flat.
Data connection in Kamikochi – Kamikochi station has full 4G coverage, but there will be very limited data connection once you leave the Kamikochi station area. Around the lodges, you might receive 3G or even 4G connection, but the speed won’t be very fast as they use satellites. It was enough to receive messages but not enough to send photos. In my experience DOCOMO was the best operator.
Food options in Kamikochi – similar to data connection, Kamikochi station and Kappabashi area has tons of option for food and snacks, but once you leave for your trek you can only get food at the lodges. So if you intend to do a long trek (past Yokoo Sanso), make sure you bring some snacks and water!
Luggage Storage in Kamikochi – There is a luggage storage at Kamikochi bus station, but it’s not a coin locker. Rates are by the day. Small: ¥350 / Medium: ¥400 / Large: ¥500 (¥600 for oversized). Bags can be stored overnight, and the office is only open from 6:00 a.m. to 5:00 p.m. Click here for more information.
Accommodation – private lodges and beds at the mountain lodge gets booked up really fast during peak season. I suggest booking as soon as you have firmed up your itinerary. Scroll down for the list of accommodations!
Wild Japanese Macaque – You might encounter these cute monkeys while in Kamikochi. But no matter how cute, they are still wild animals. Do not approach or attempt to feed them. Monkeys can be very territorial. If you see a group of them on your trek, it’s best to walk confidently past them and most importantly do not make an eye contact. Eye contact are seen as a sign of aggression and the alpha males might attack you. Keep all food away from their sights.
Kamikochi Trekking Map – Kamikochi visitor center sells walking maps for 1,100 yen. It’s not super necessary if you’re just going to hike the Karasawa Circque (which is the route I am describing on this blog) since the trails are very well-marked, but if you’re going further I recommend buying the map before you leave the bus station.
Check the weather – I find that even google weather is quite accurate for Kamikochi. If it says it’s going to rain, it’s going to rain and you better be prepared for it! On the up side, if it says it’s going to be sunny then you’re in for a treat 🙂
Where to stay in Kamikochi
Kamikochi area is doable as a day trip, but if you want to see more of the Japanese alps, you’ll have to make it at least a 2-day trip. Even if you are not doing a day trip, staying in Kamikochi is a nice get away from the city! Here are some ideas of where you can stay:
1. For the Karasawa Cirque trek overnight stay:
Yokoo Sanso is the lodge we stayed for our overnight stay. It’s about 10km (3 hours) walk from Kamikochi bus station on easy flat trail, so you should not have any issues reaching this lodge.
I really loved this place – it’s very nicely built and clean. It has a drying room you can dry your jacket and gears in, and a small bathhouse with hotspring water which is great after walking in the cold. The two meals we had were delicious too! 3G/4G is available on DOCOMO (one of the telcos in Japan) via satellites, so the speed was not very good and intermittent at best. I was able to receive messages on WhatsApp in the morning but not at night when everyone is settling down at the lodge.
Price: 14,000 yen / person / day for the lodge. This gets you a bunk with blanket and sheets, two meals (dinner and breakfast) and towels. There are cheaper options if you don’t need meals. If you bring your own tents and food, you can also camp outside for only 2,000 yen per adult. Their cafeteria also sell bento boxes for 1,500 yen and lunch meals for 1,200 yen (curry, ramen, udon, etc).
How to book: Check out the Yokoo Sanso reservation page for more information. Technically you don’t need to book as they have spillover large room, but you would be sharing this room with 20 people and the price is still the same, so try to book a bunk if you can.
Official Website: Yokoo-Sanso English website
Other options: Aside of Yokoo-Sanso, you can also consider the following lodges:
- Karasawa Hyutte – Location wise, this is the most ideal for the 2 days Karasawa Cirque route, but it’s also harder to reach. You can find more information on the Karasawa Hyutte English page or read about my trek below.
2. For stay around Kamikochi station:
- Basic Accommodations – If you want to stay close to nature and don’t mind basic shared accommodations, the following could be a good option for you. Keep in mind they are not super cheap (about 8,000-10,000 yen per person each day), but that’s the price you pay for accommodation in Kamikochi!
- Konashidaira Campsite and Cabins is a popular option, but it’s very difficult to book due to high demand. See this PDF (in English) for types of cabin and camping info. In my experience, they never responded to my email but answered to phone calls.
- Myojinkan Lodge – This is located on the Karasawa Cirque route, about 1 hour into the trail from Kamikochi bus station.
- Tokusawaen Lodge & Campsite – Also located along the Karasawa Cirque trail, about 2 hours into the trail from Kamikochi bus station.
- Hotels, Resorts and Ryokan – If you can spend a bit more, these hotels are a short distance from Kamikochi station but provide full service. Some of them are ryokans, which means you can get the traditional Japanese hospitality.
- Kamikochi Nishi-itoya (Ryokan)
- Hotel Shirakabaso (Ryokan)
- Kamikochi Lemeista Hotel
- Taishoike Hotel
Trek Itinerary Options for Karasawa Cirque
Karasawa Cirque is a popular hike that takes you from Kamikochi to Karasawa Hyutte. It’s recommended to do this route over the course of at least two days.
The estimated time to complete the round trip trek for Karasawa Cirque is 12 hours. Technically you can do this in one day if you are super fit, it just won’t be a comfortable day. There are a few lodges you can stay on the way in Karasawa Cirque so make sure you consider staying there.
Here are a few route options to accomplish the Karasawa Cirque route:
Option 1: Kamikochi – Yokoo Sanso (overnight stay) – Karasawa Hyutte – Kamikochi
From Kamikochi to Yokoo Sanso, it’s an easy 3 hour walk on flat trail. You can then opt to stay at Yokoo Sanso overnight. From Yokoo Sanso to Karasawa Hyutte, it’s another 3 hours walk but on a more steep terrain which can be slippery when it’s raining. Once you are done at Karasawa Hyutte, you can then go back down to Kamikochi which should take about 6-7 hours.
This is the option I went with. I recommend this route if the weather isn’t so good on the day of your arrival, but the weather the next day is good. You should also only do this option if you are fit enough to do 10 hours of hiking and walking in one day. On the day we arrived, it had been raining all day and I was glad I didn’t have to do the Yokoo Sanso – Karasawa Hyutte portion in that rain! The down side for this option is that is you would be walking 9-10 hours on the second day, so make sure to check the forecast for good weather.
Option 2: Kamikochi – Karasawa Hyutte (overnight stay) – Kamikochi
From Kamikochi to Karasawa Hyutte it should be about 6-7 hours. You can stay overnight at Karasawa Hyutte. Then, the next day you can come back down to Kamikochi.
I think this is the most ideal option, as it allows for the most evenly distributed hours of hiking. But I would only do this if the weather is forecasted to be good on both days. Otherwise I don’t recommend doing the Yokoo – Karasawa Hyutte portion (or the other way around) during rain, just because it can get steep and slippery.
Option 3: Beyond Karasawa Hyutte (If you have more than 2 days)
If you have more than 2 days and reasonable fitness, you can go past Karasawa Hyutte and head towards Mount Hotadake. This would extend your trip to 3 days, and also requires more fitness and mountaineering skills. The routes beyond this point is more advanced. Please visit Kamikochi Visitor center at the beginning of your trip and get advice on the route.
Karasawa Cirque: What the route was like and what to expect
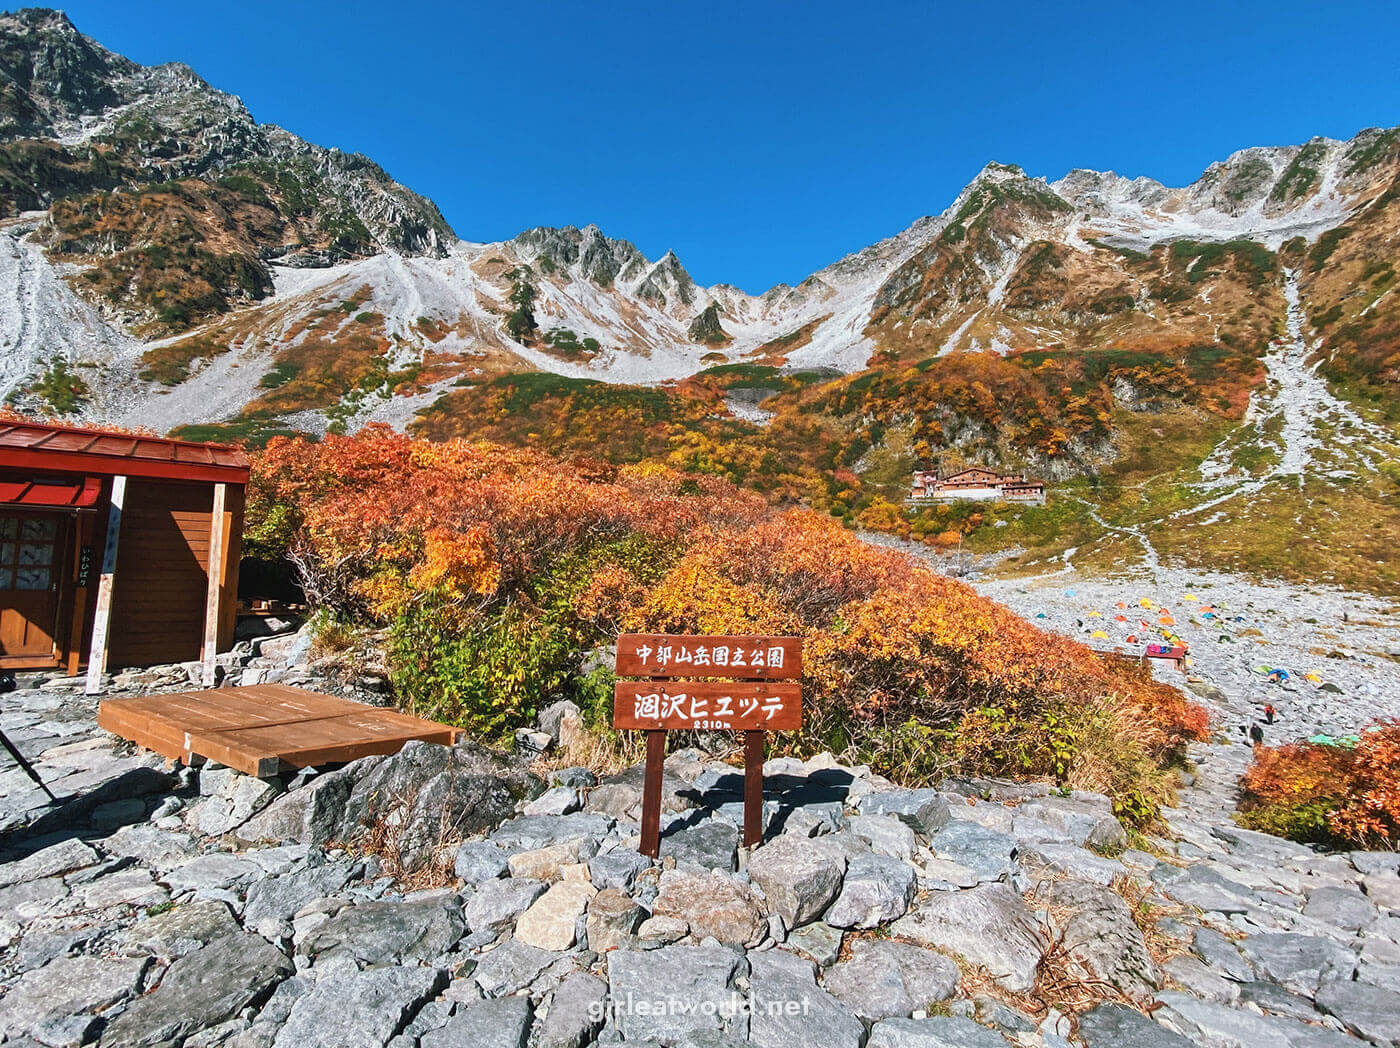
Start: Kamikochi (1,505m elevation)
End: Karasawa Hyutte (2,310m elevation)
Distance: ~30km round trip from Kamikochi to Karasawa Hyutte
Day 1: Kamikochi – Yokoo Sanso (3 hours)
| 12:30PM | Arrive at Sawando Bus Terminal |
| 12:50PM | Board the bus to Kamikochi |
| 1:20PM | Arrive at Kamikochi Bus Station (0km) |
| 1:50PM | Reach Kappabashi (0.4km walked) |
| 4:30PM | Reach Yokoo-Sanso Lodge (10km walked) |
We arrived at Sawando Bus Terminal from Matsumoto around 12:30PM. After parking our car at the bus terminal carpark, we walked to the bus station and bought our ticket. The process of buying a bus ticket is extremely easy! There is a ticket vending machine in english. The round trip from Sawando Bus Station to Kamikochi is 2,150 yen. We caught the 12:50PM bus and went on our way to Kamikochi.
We arrived at Kamikochi Bus Station around 1:20PM. As soon as we got off, someone told us to get a numbered ticket for the way back, so we went to check out what it’s all about – turns out you only need to do this if you’re going back to Matsumoto by bus which doesn’t apply to us.
We made a brief stop to the toilet and at the visitor center to get some information about the treks. We ended up getting a hiking map for 1,100 yen, but I think this is not really necessary if you’re just doing the trek to Karasawa Hyutte. The trail is very clearly marked. I still recommend stopping by the visitor center just to get ideas about the trek route – and possible bear sightings over the past week.
As I’ve said earlier, we allocated 2 days and 1 night in Kamikochi. We actually weren’t planning on going all the way to Karasawa Hyutte since I was in my trimester of my pregnancy and we were not sure if I’ll be able to do long hikes. But once we got to Kamikochi Visitor Center and got more information, we realized it actually makes more sense for us to push through to Karasawa Hyutte. It was almost peak Autumn leaves color time and we did not want to miss a beautiful hike!
Also I felt really good with my pregnancy and felt that I can do it. The weather was also looking to be very cooperative – it was cold and rainy when we arrived, but forecast for the next day was sunny all day.
We decided to stick with our original plan of staying overnight at Yokoo-Sanso due to the rainy weather, and push through to Karasawa Hyutte and then back to Kamikochi the next day when the weather is good. We realize this is not the most balanced hiking plan, but I was also not super excited at the prospect of walking more than 3 hours in the rain on the first day.
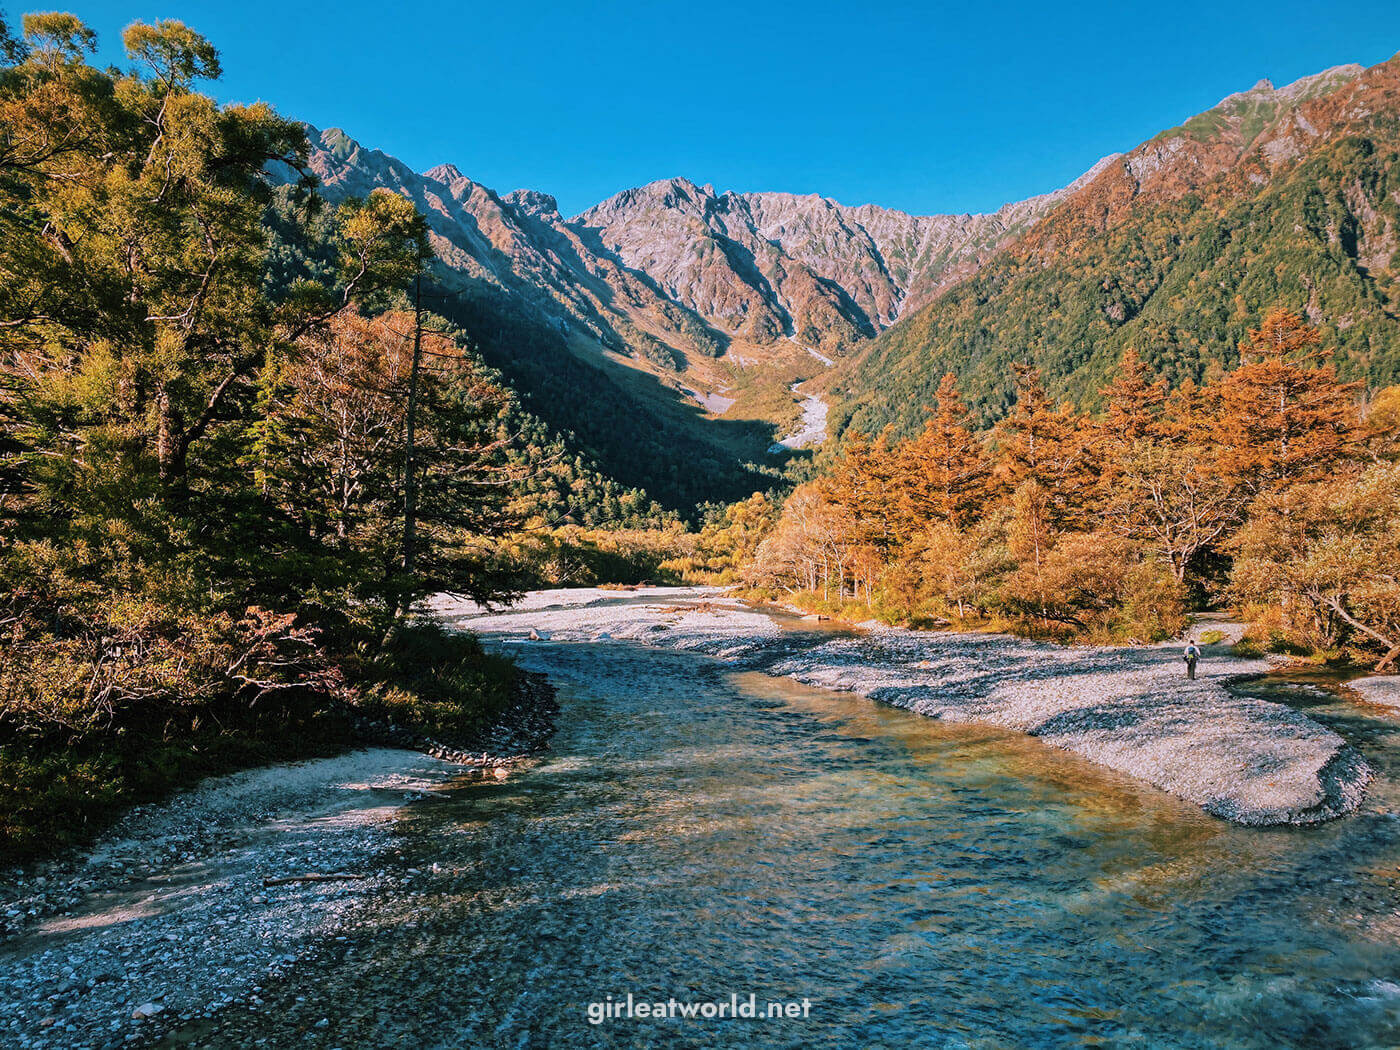
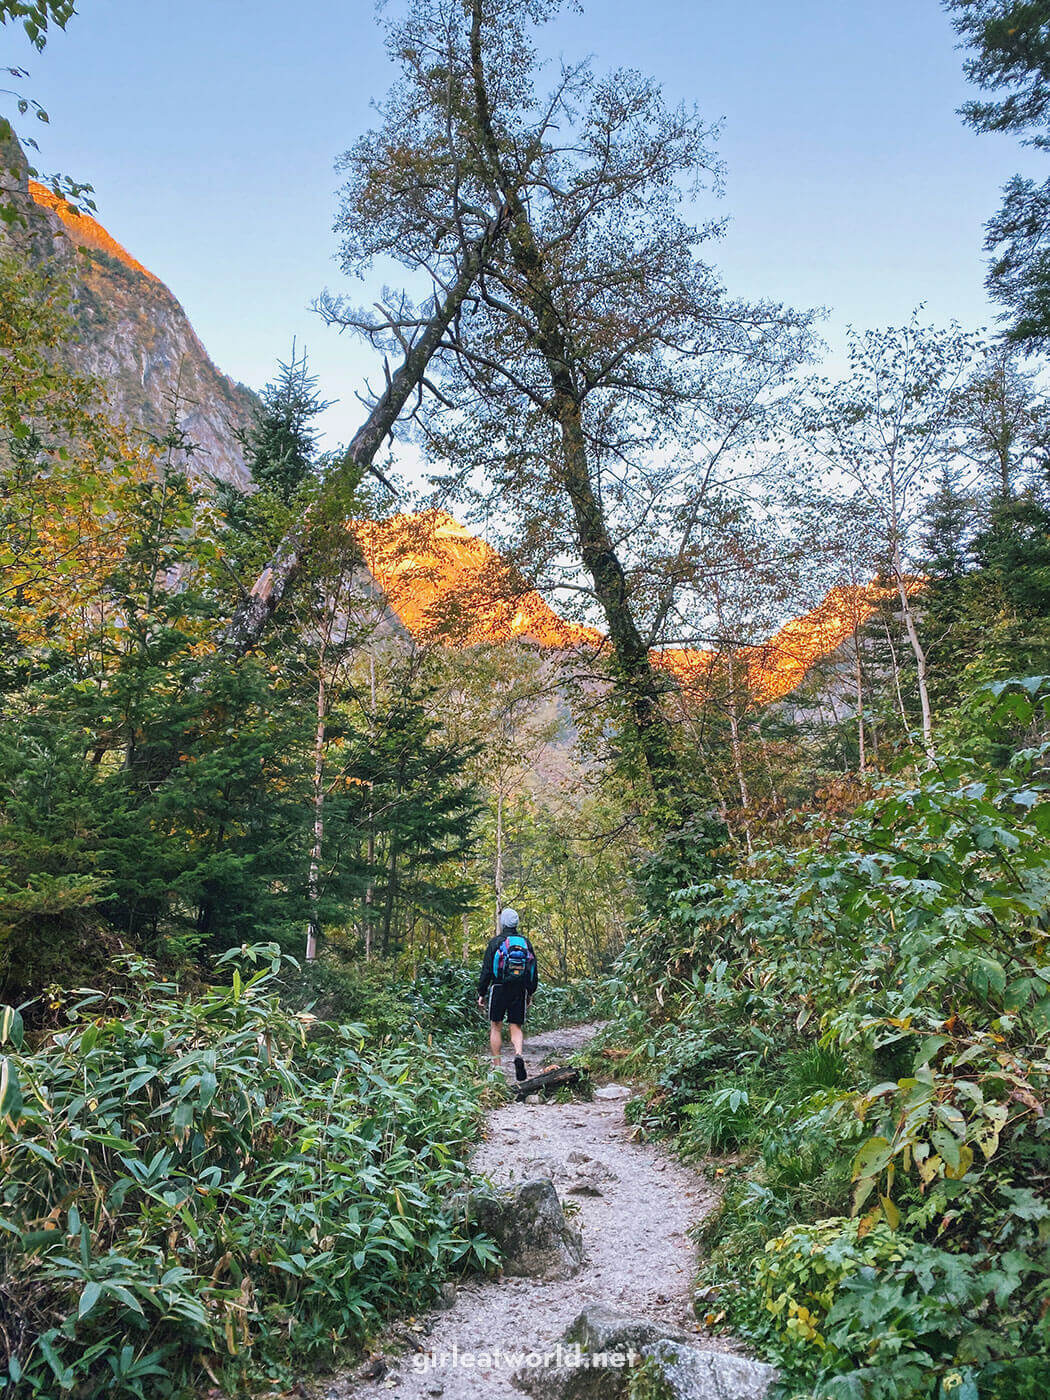
So off to Yokoo-Sanso we go! We started the walk from Kappabashi around 1:50PM for a 10km trail to Yokoo-Sanso. I have to say this part of the trail is quite uneventful – there isn’t much change in elevation – but for a rainy day, it’s perfect.
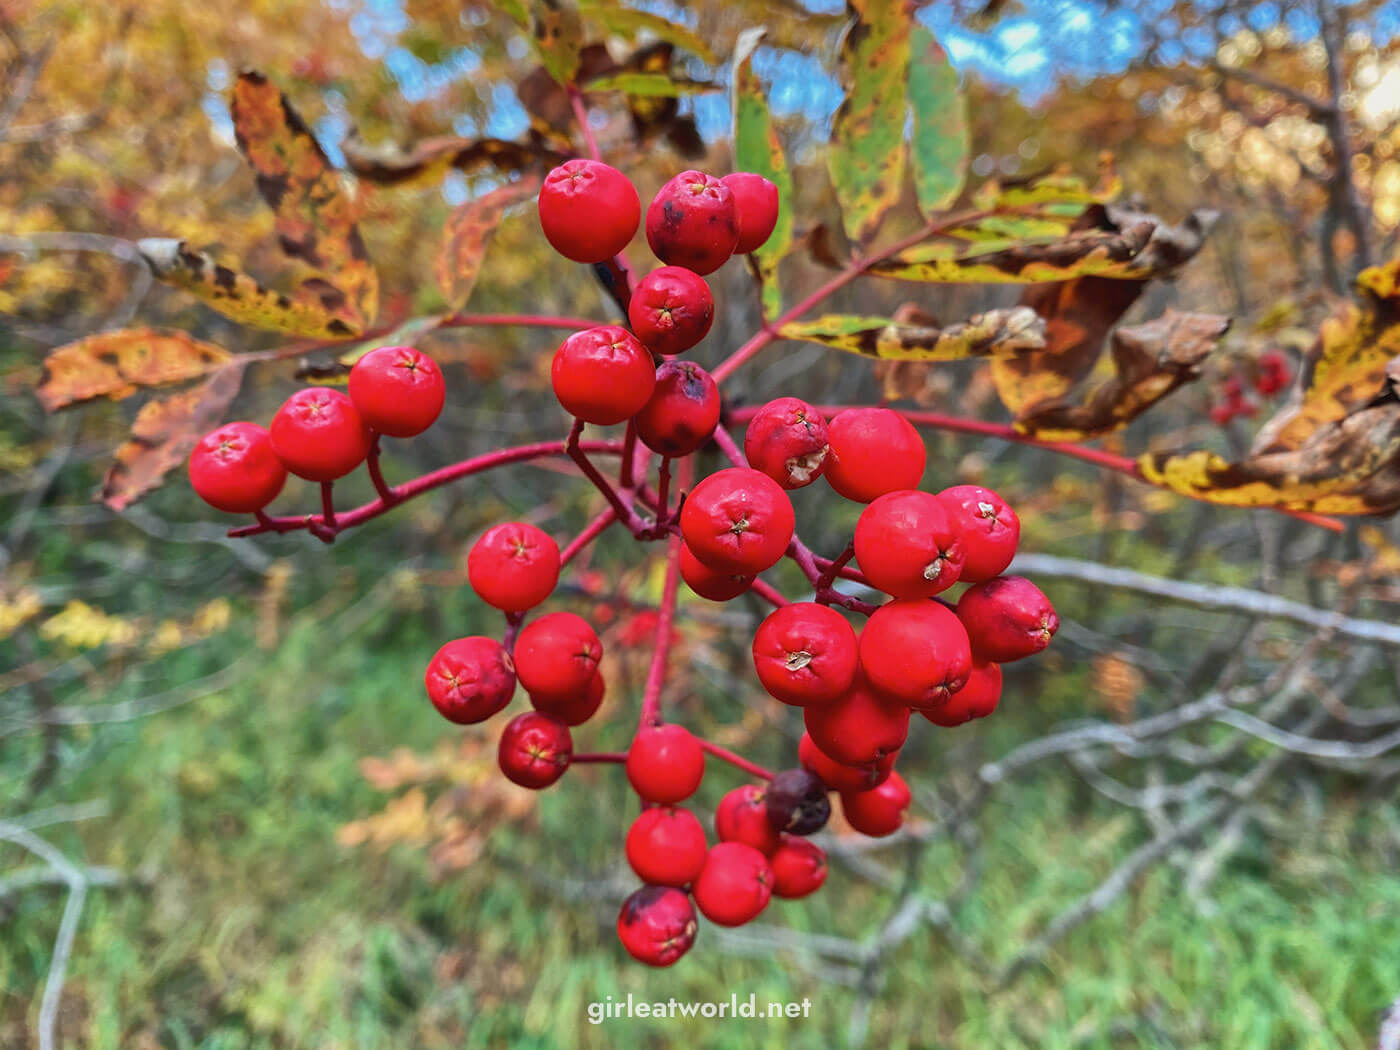
Along the way, you’ll walk past Kinoshidaira Camp and Myojin Lodge. If you’re up for it, you can make a slight detour to check out Myojin Pond but keep in mind there is a 300 yen entrance fee. Personally, I did not think it was worth the detour – everything else in Kamikochi is free!
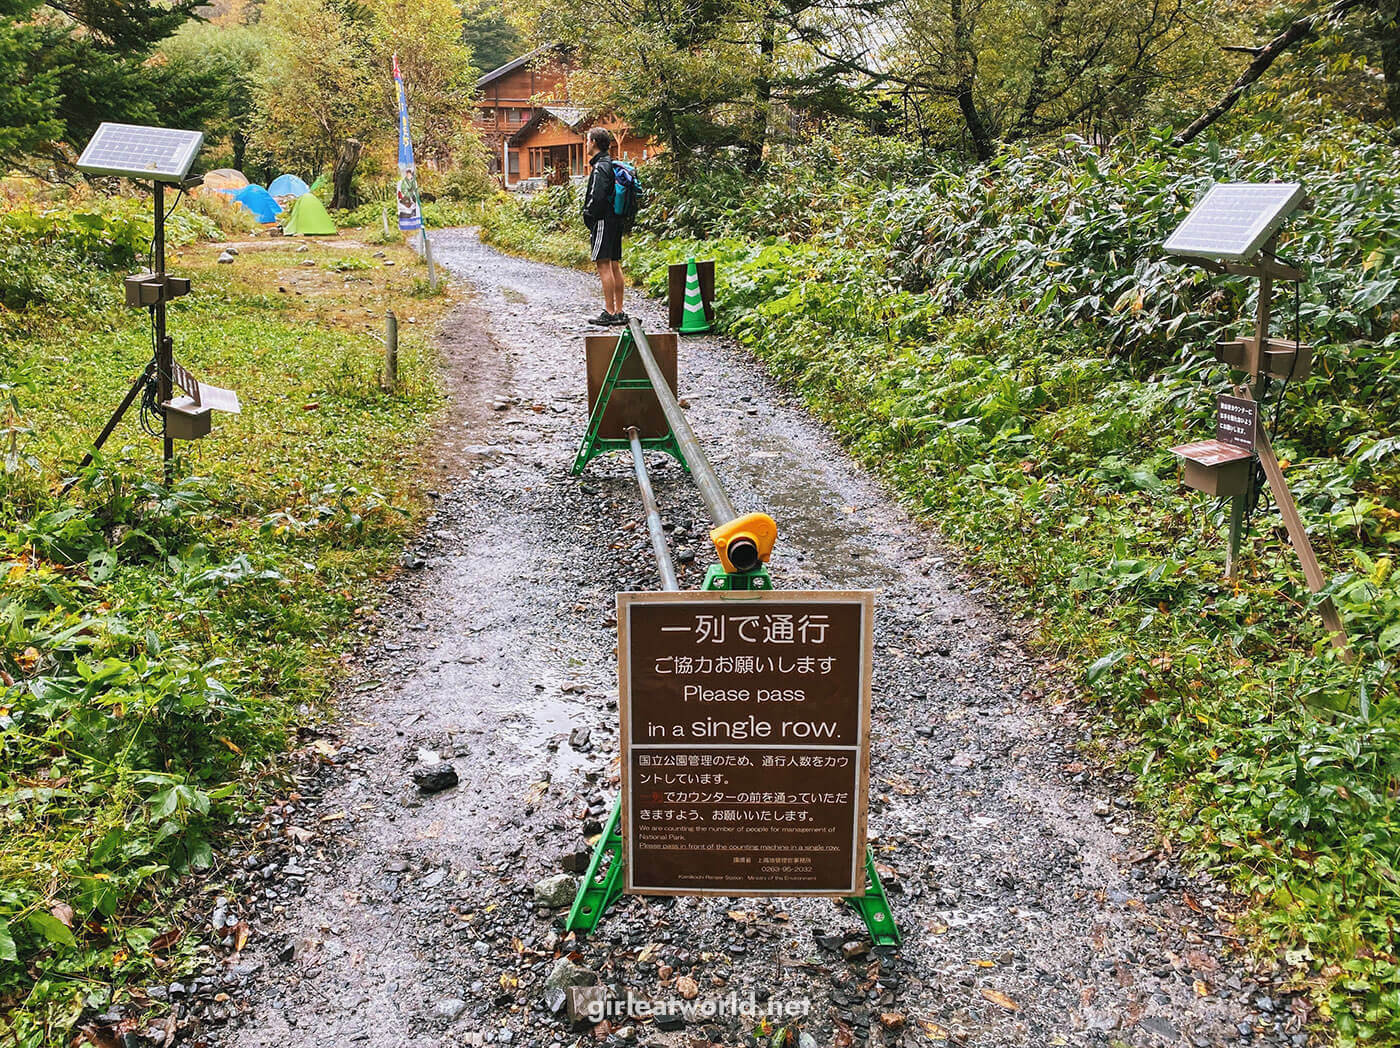
Every now and then, we’d pass by a visitor counting mechanism (see photo below). I guess this is how the Japanese government keeps a count of how many people visits Kamikochi and how far they go. Pretty cool!
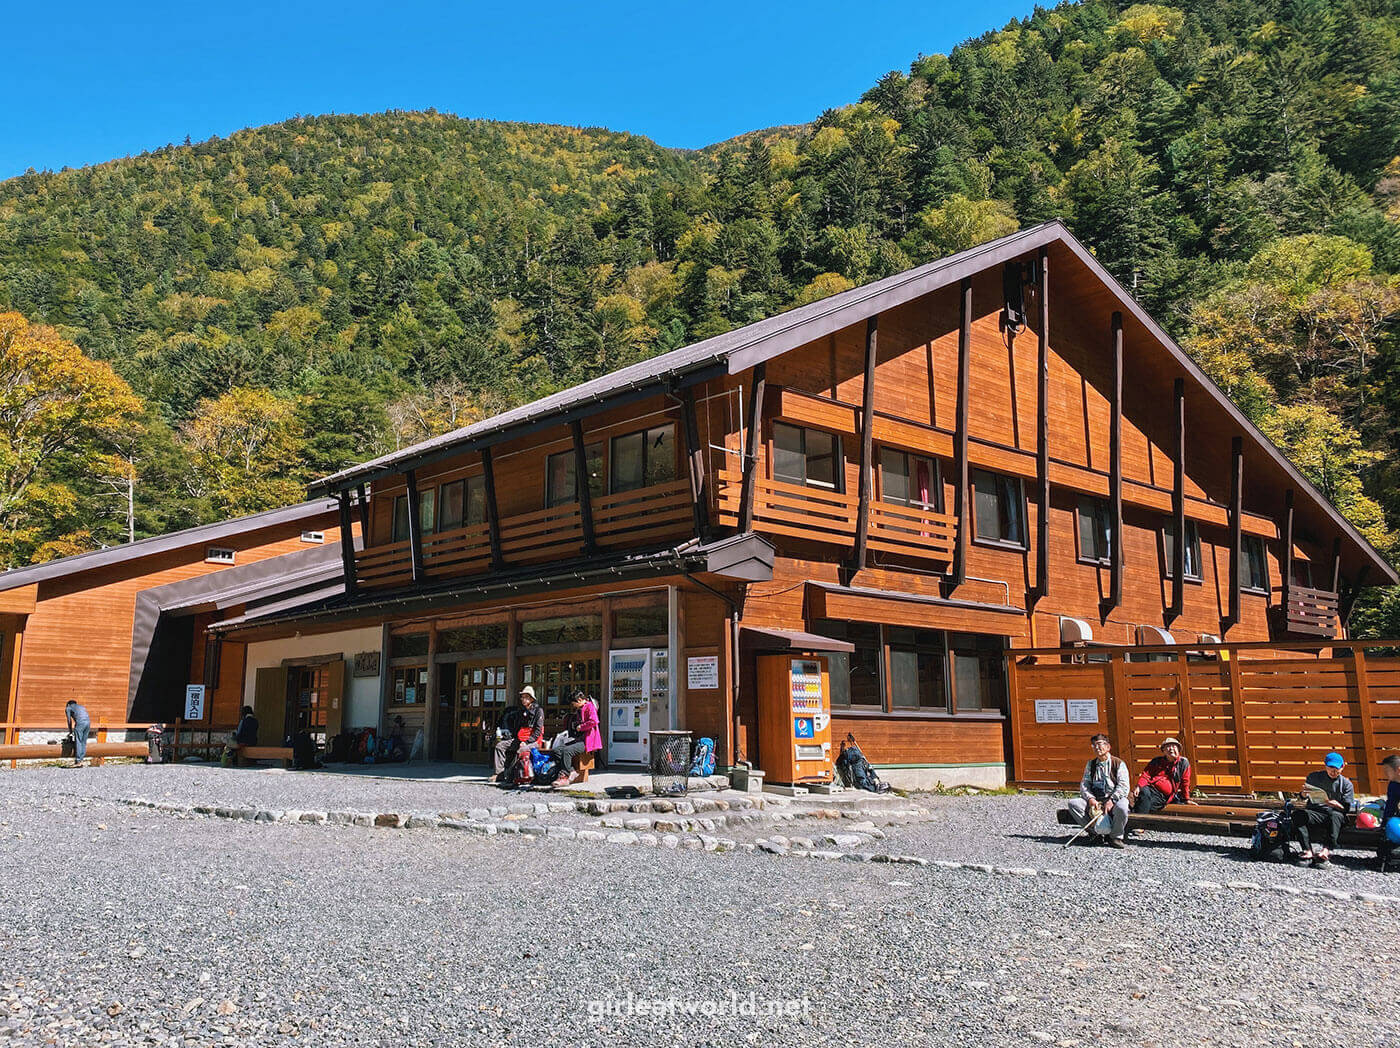
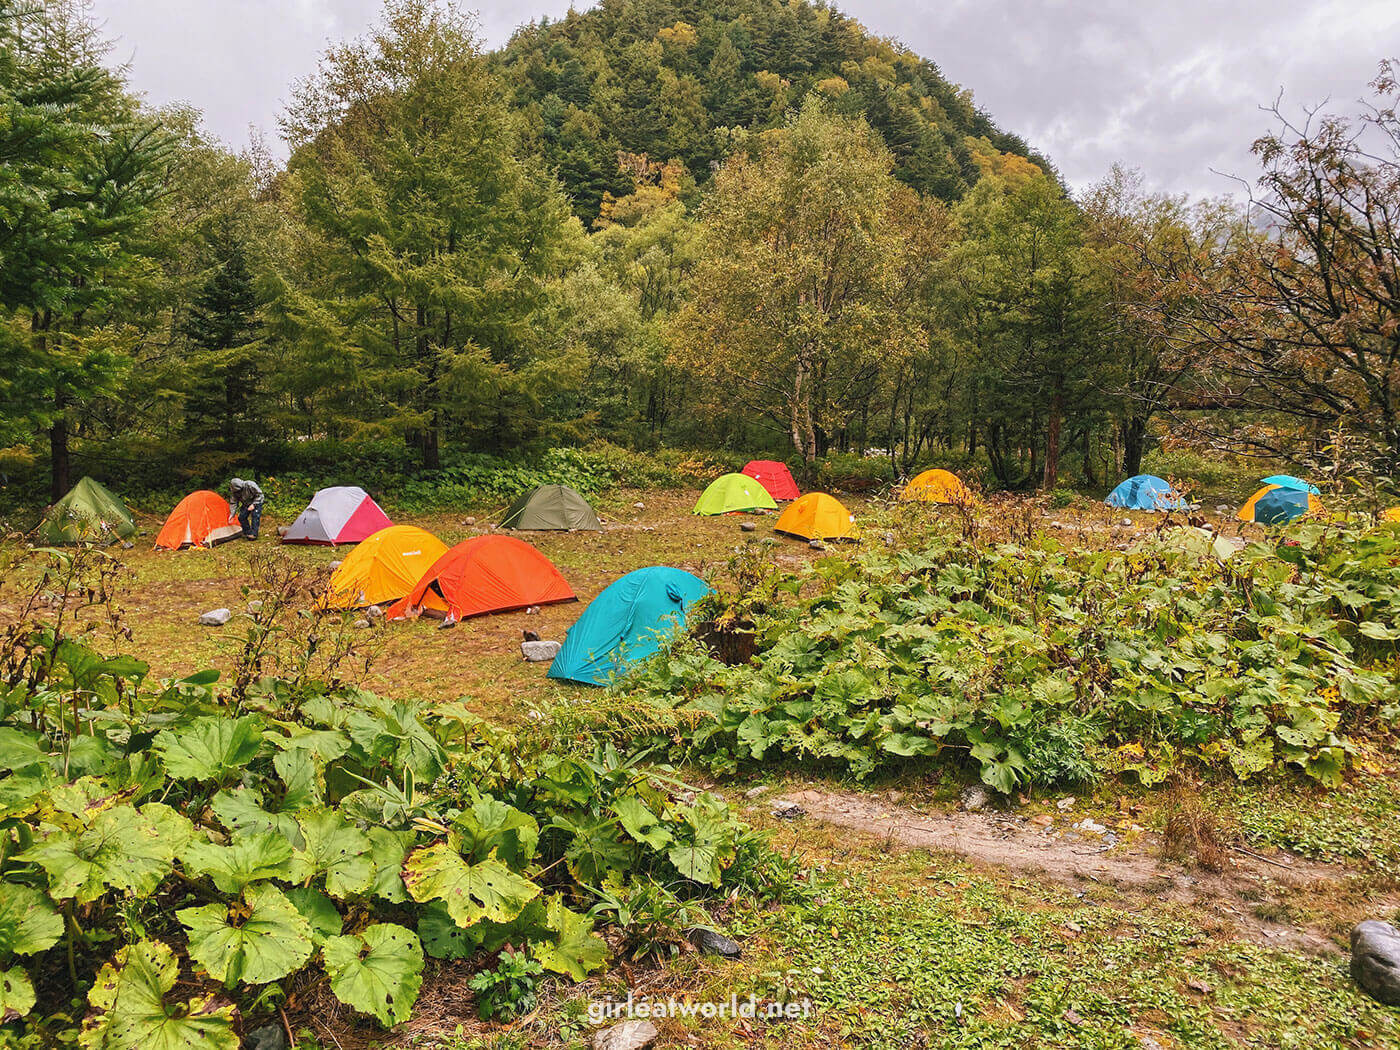
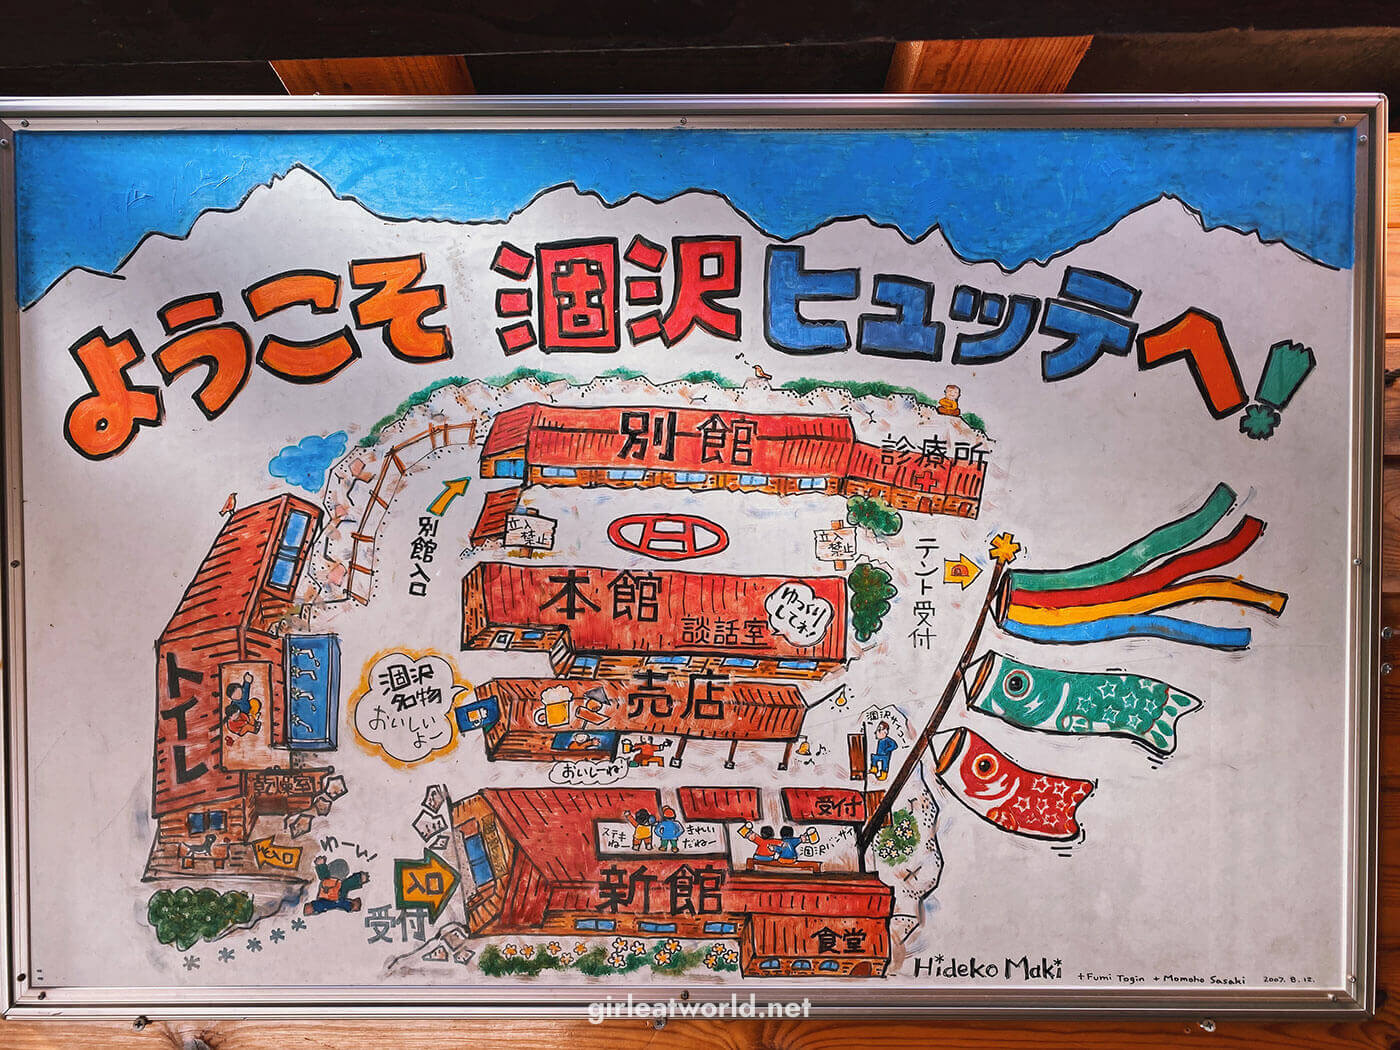
The clock reads 4:30 PM when we finally caught our first glimpse of Yokoo Sanso Lodge. We spotted a few brave campers weathering out the rainy day outside. Just past them is Yokoo Sanso Lodge – we immediately went inside and checked ourselves in.
Upon check-in, we were given our bunk numbers, a small towel for bathing, and 2 meal vouchers per person for dinner and breakfast. We were also told to put our shoes inside a plastic bag and go barefoot inside the lodge – a typical Japanese culture.
If your gear got soaked during the hike, there is a drying room you can put your stuff in overnight. A drying room is a thing in Japan – it’s this room that acts like your usual laundry drying machine, it just might take a few hours to fully dry your stuff. Trivia: Almost all the shower rooms in houses / apartments in Japan can also serve as a drying room!
Anyway, the drying room was already full with everyone’s jackets and boots when we arrived as it had been raining all day. Also worth noting, there is a vending machine with cold Asahi beer outside of the lodge – because… Japan.
Dinner starts at 5 PM but the queue was already long by 4:45 PM, so we decided to hit the bathhouse first. The bathhouse at Yokoo Sanso is clean but tiny and extremely basic. You cannot use shampoo or soap so that the used bath water doesn’t contaminate the environment. The water temperature is still above 40C though, which is really, really, nice after walking in cold rain. There was no other towel provided aside of the small towel, but I found that towel to be sufficiently absorbent to dry my entire body.
When we got out of the bath, the dinner queue was about half what it was before. We actually got in within 5 minutes since there’s only two of us.
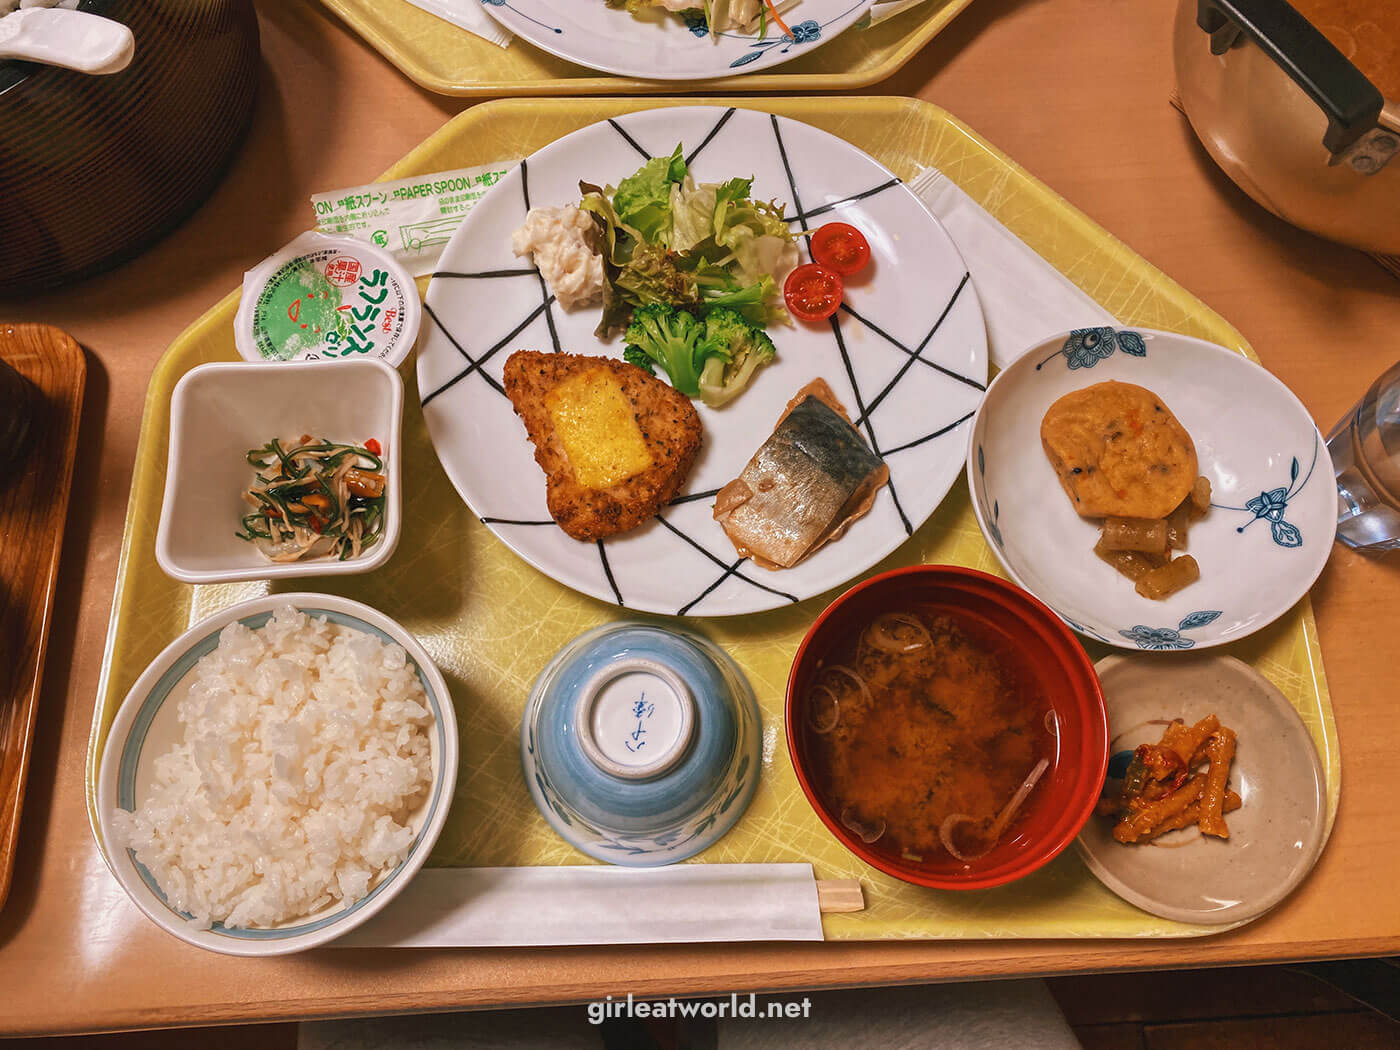
Dinner was more than I expected from a lodge on the mountain. We had rice, miso soup, vegetables, a chicken patty with cheese, and grilled white fish. There’s even a pear jelly for dessert.
Satisfied with dinner, we returned to our room which we shared with 10 other elderly Japanese men (there were a total of 12 bunks per room). We made our beds at the bunk, prepped for the next day and I promptly fell asleep around 6:30 PM, knowing we had a full day ahead of us tomorrow. It also helps that we didn’t get a strong data connection so there was nothing to distract me from sleeping.
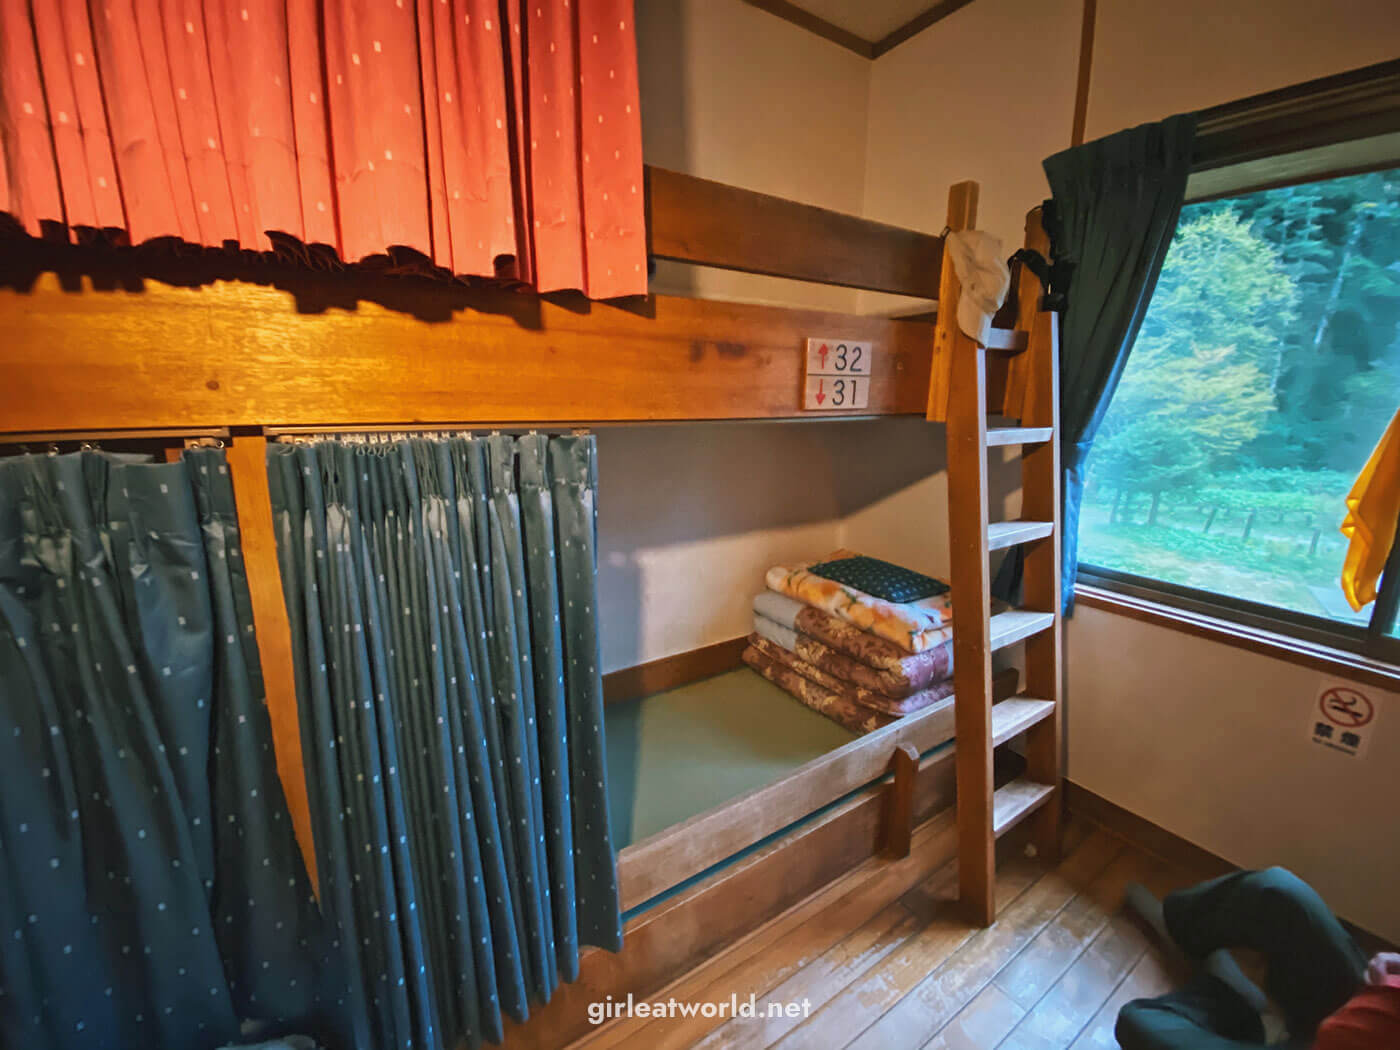
That night, some of our roommates were snoring pretty loudly… 😅 Thankfully I am used to such sharing bunks (from my solo budget trips) – this did not bother me TOO much. I slept straight to the next day.
Day 2: Yokoo Sanso – Karasawa Hyutte – Yokoo Sanso – Kamikochi (10 hours)
| 5:30 AM | Left Yokoo Sanso (0km walked) |
| 6:30 AM | Reached Hontani Swing Bridge (3.1km walked) |
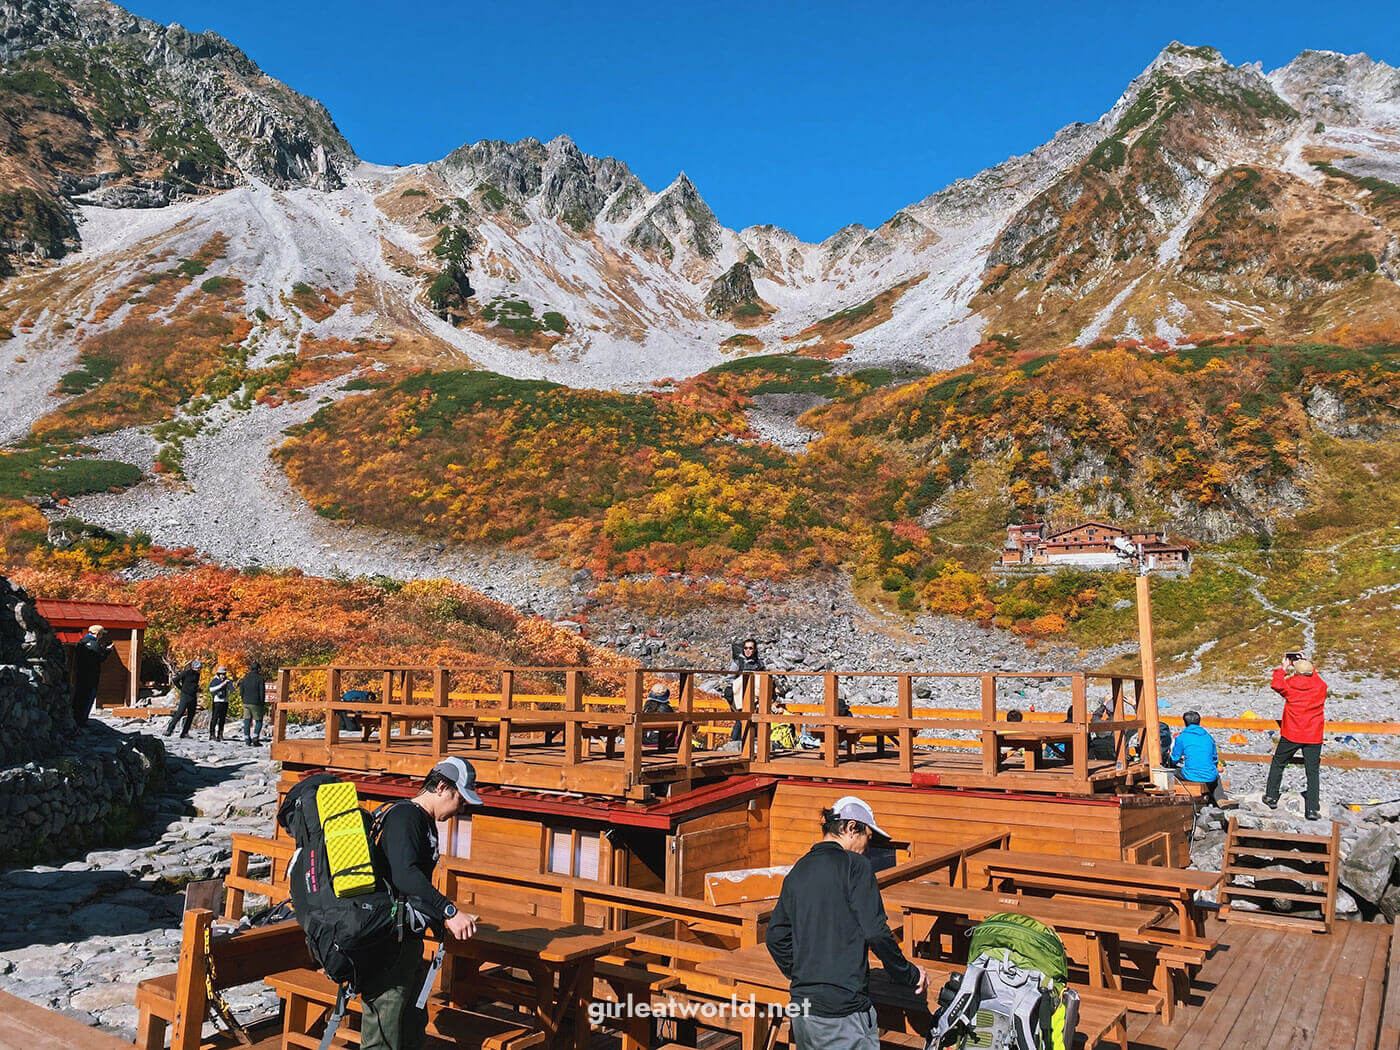
| 8:25 AM | Reached Karasawa Hyutte (5.4km walked) |
| 9:10 AM | Descended back to Kamikochi |
| 11:50 AM | Back at Yokoo Sanso, rest for 30 minutes (10.8km walked) |
| 12:20 PM | Resumed walking back to Kamikochi |
| 3:30 PM | Reached Kappabashi (20.5km walked) |
| 4:05 PM | Got on the bus back to Sawando Terminal |
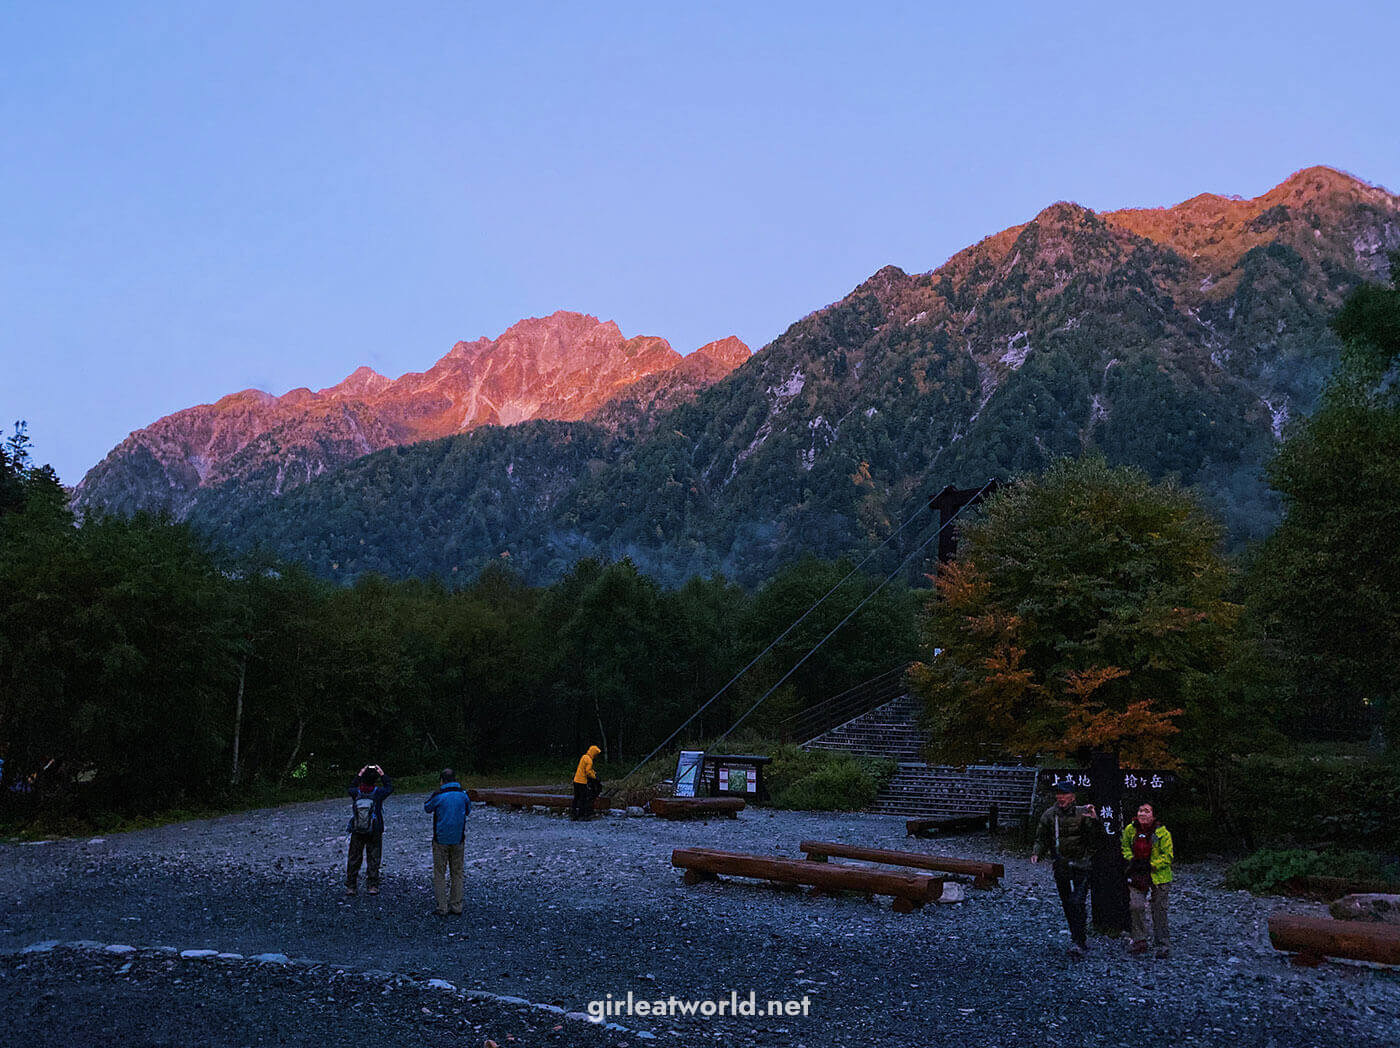
We woke up bright and early at 4:30 AM. Actually, it was more like we were woken up by the rest of our room. The communal light had automatically turned on around 4 AM and everyone was up and active by then… I guess everyone knew it was going to be a good hiking day. When I got out of our room, I realized it wasn’t just our room that was active – pretty much the entire lodge is buzzing with activity! People brushing their teeth, packing their stuff, filling up their water bottles, etc.
We packed our stuff and went downstairs for breakfast, which we shared with a group of 4 older Japanese women. We didn’t converse with them much, but they were super nice – making sure our rice and miso soup bowl is filled. On a side note, many of the hikers on this route are elderly about 60-75 years of age – but don’t underestimate the hike! I’ll elaborate more on this later.
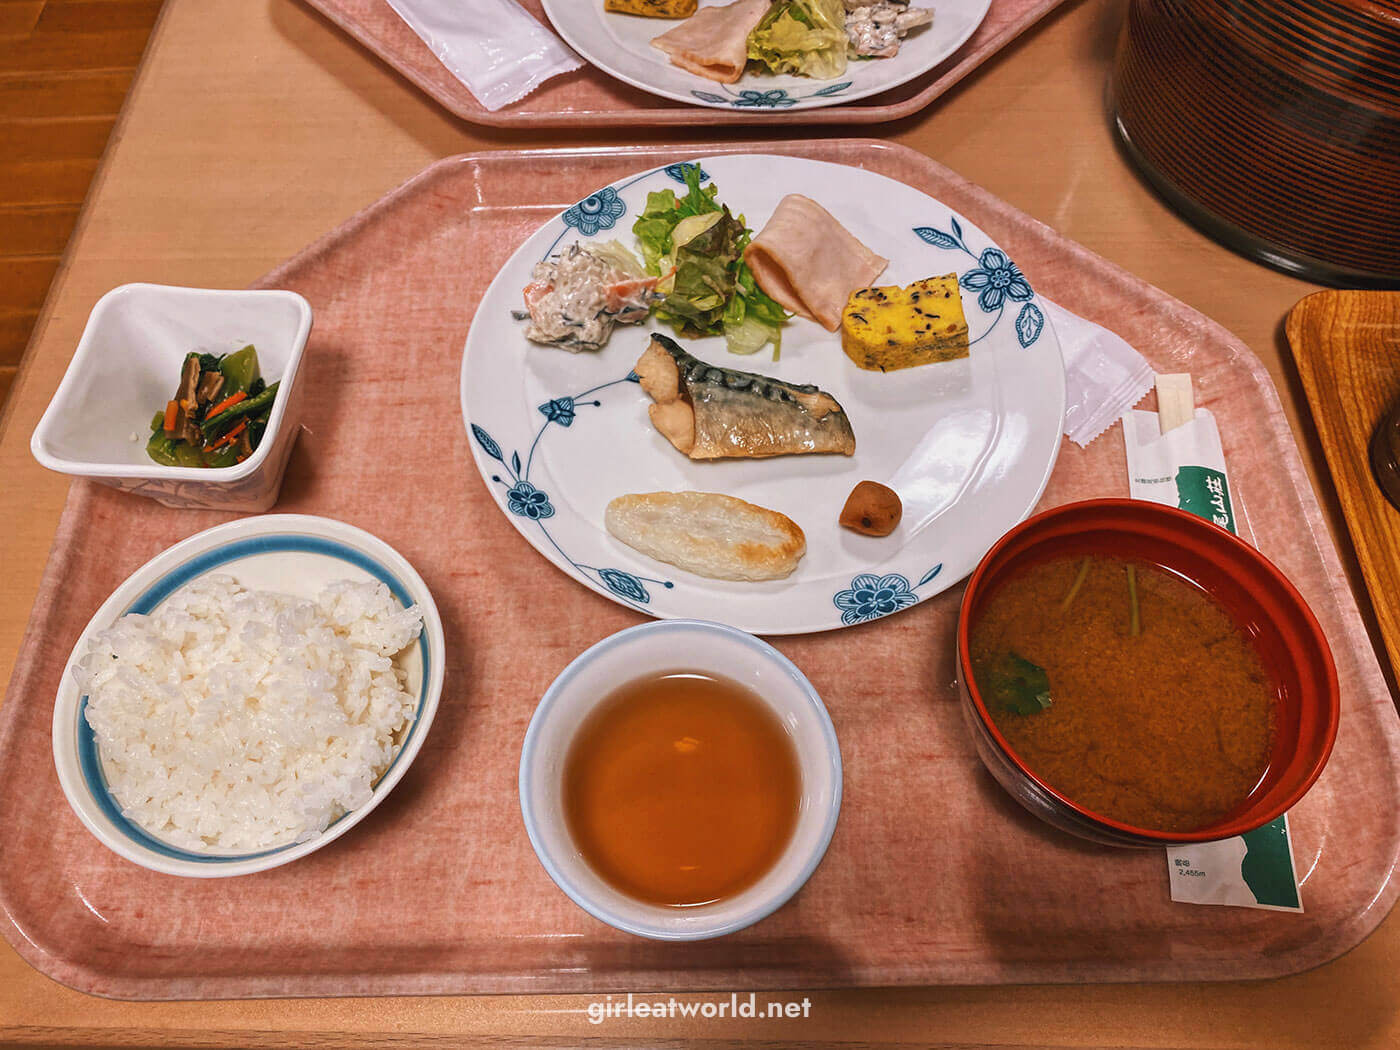
Breakfast was a very typical Japanese affair – grilled fish, some egg, vegetables rice and miso soup. After finishing breakfast, we headed out the door at 5:30AM. The weather forecast didn’t lie – it was definitely a clear blue skies kind of day! After a few quick snaps, we crossed the Yokoo Ohashi bridge and headed towards Karasawa Hyutte.
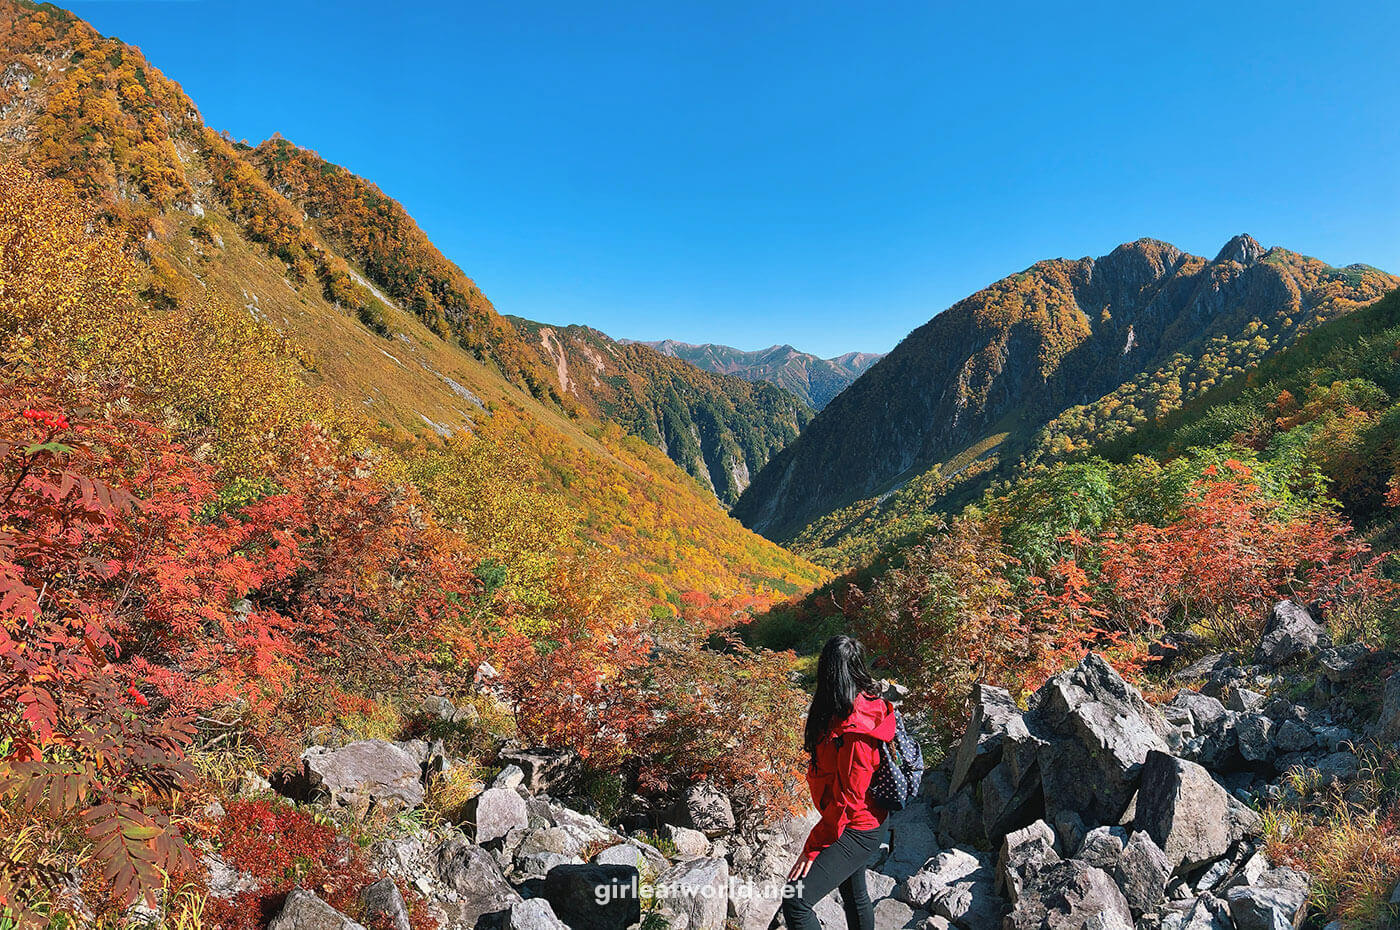
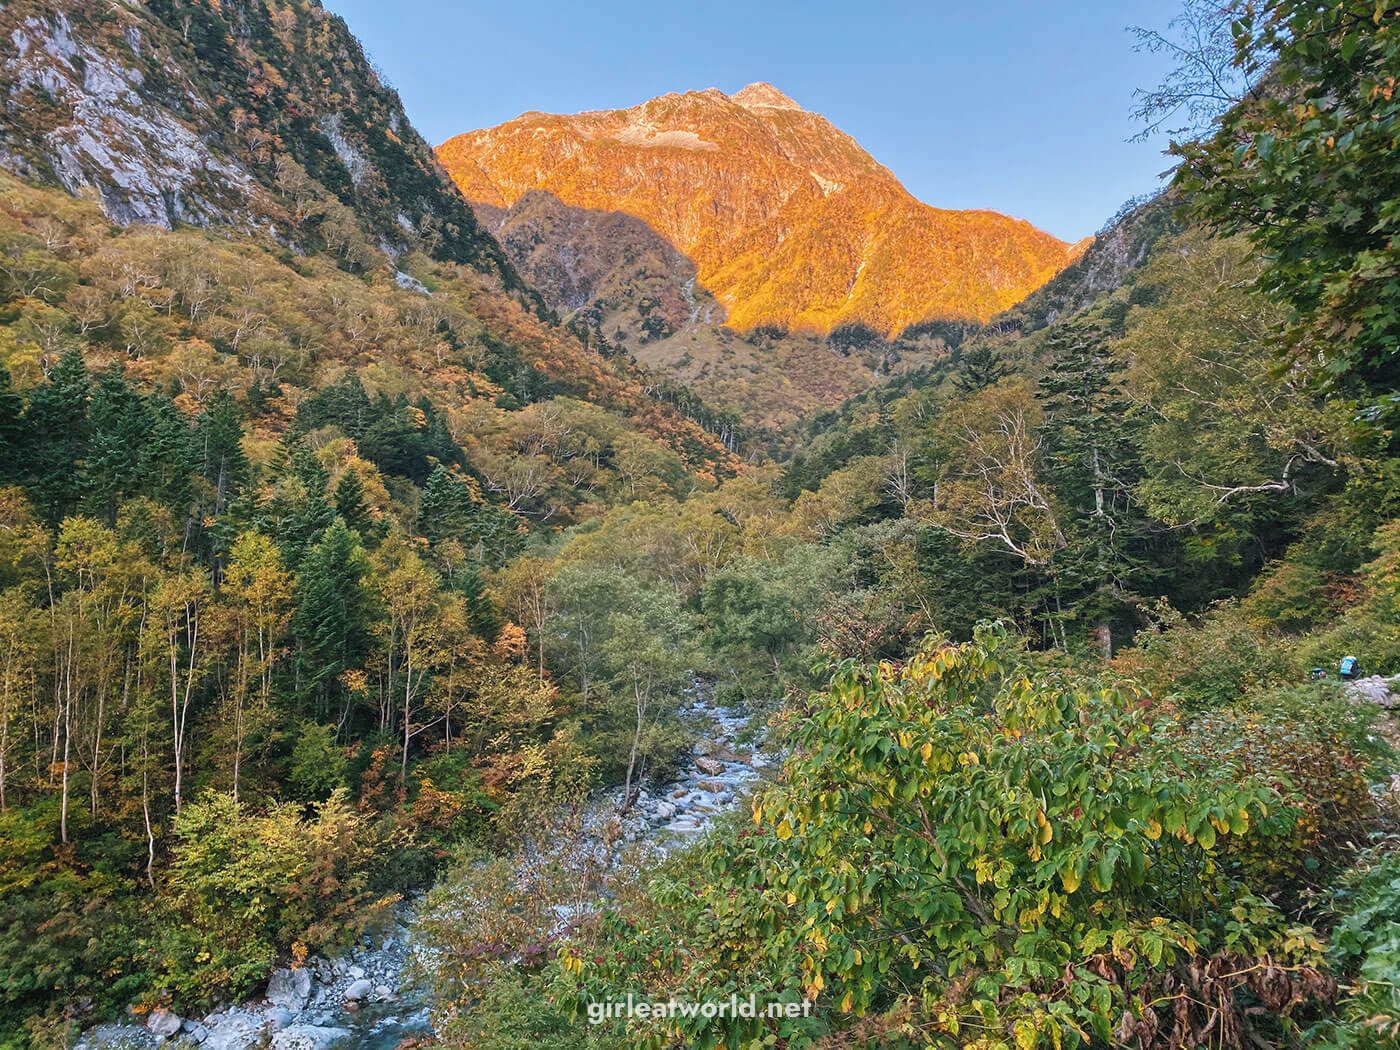
The first hour of the trek was similar to the Kamikochi – Yokoo trail. Fairly flat and drama free. But the main difference is, you start to see the view that makes this route so popular – the peaks of Japanese alps mountains! Those golden peaks definitely makes an early start like this totally worth it.
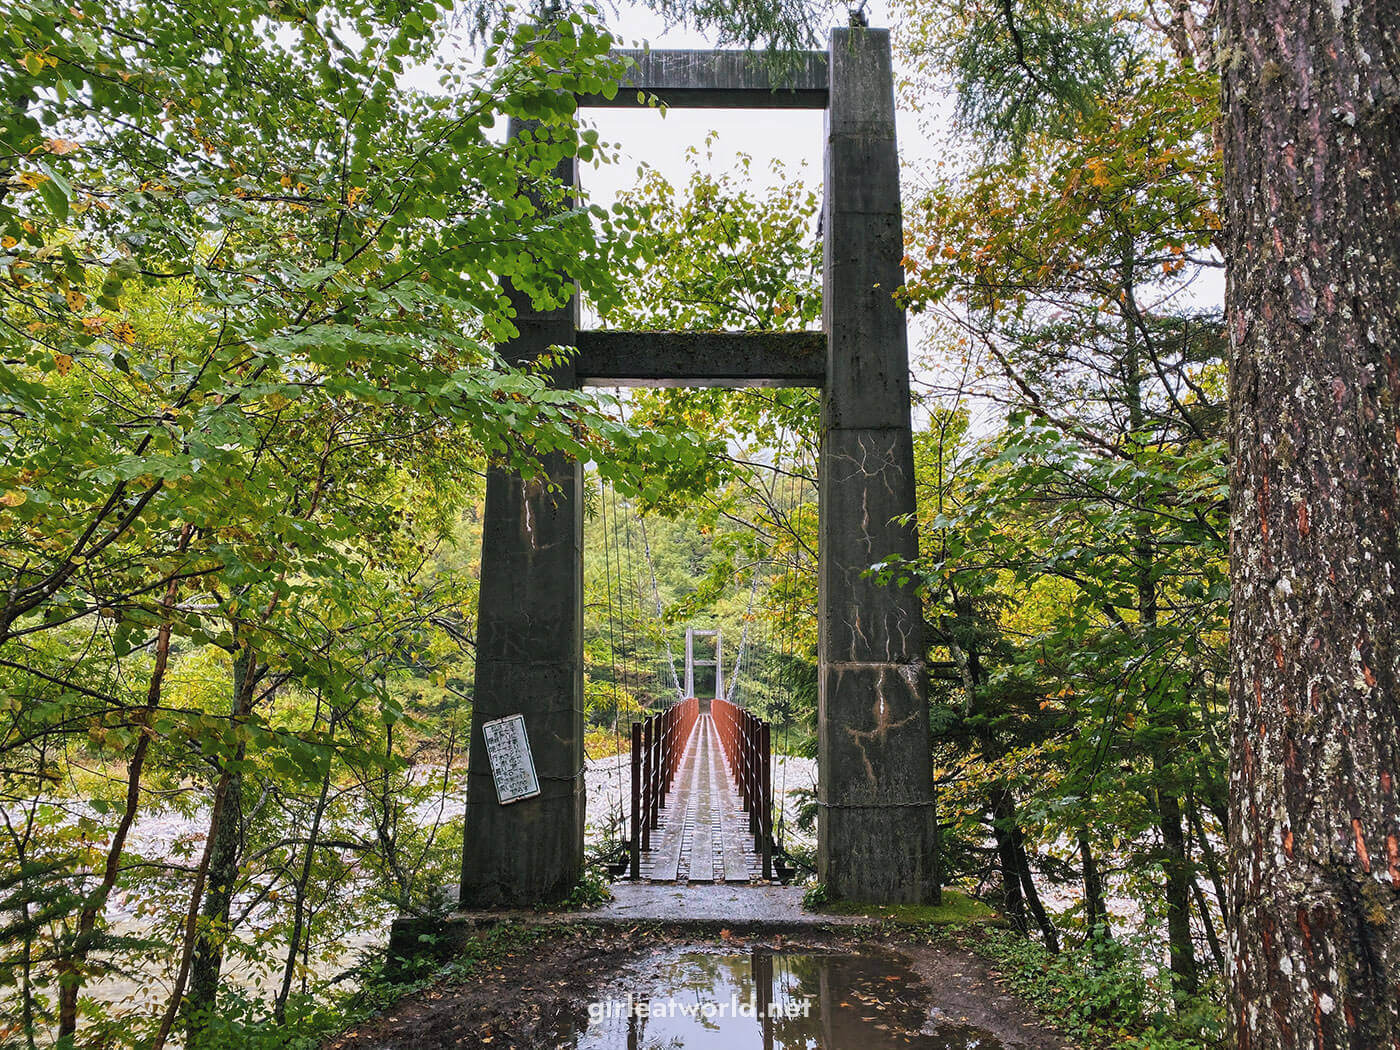
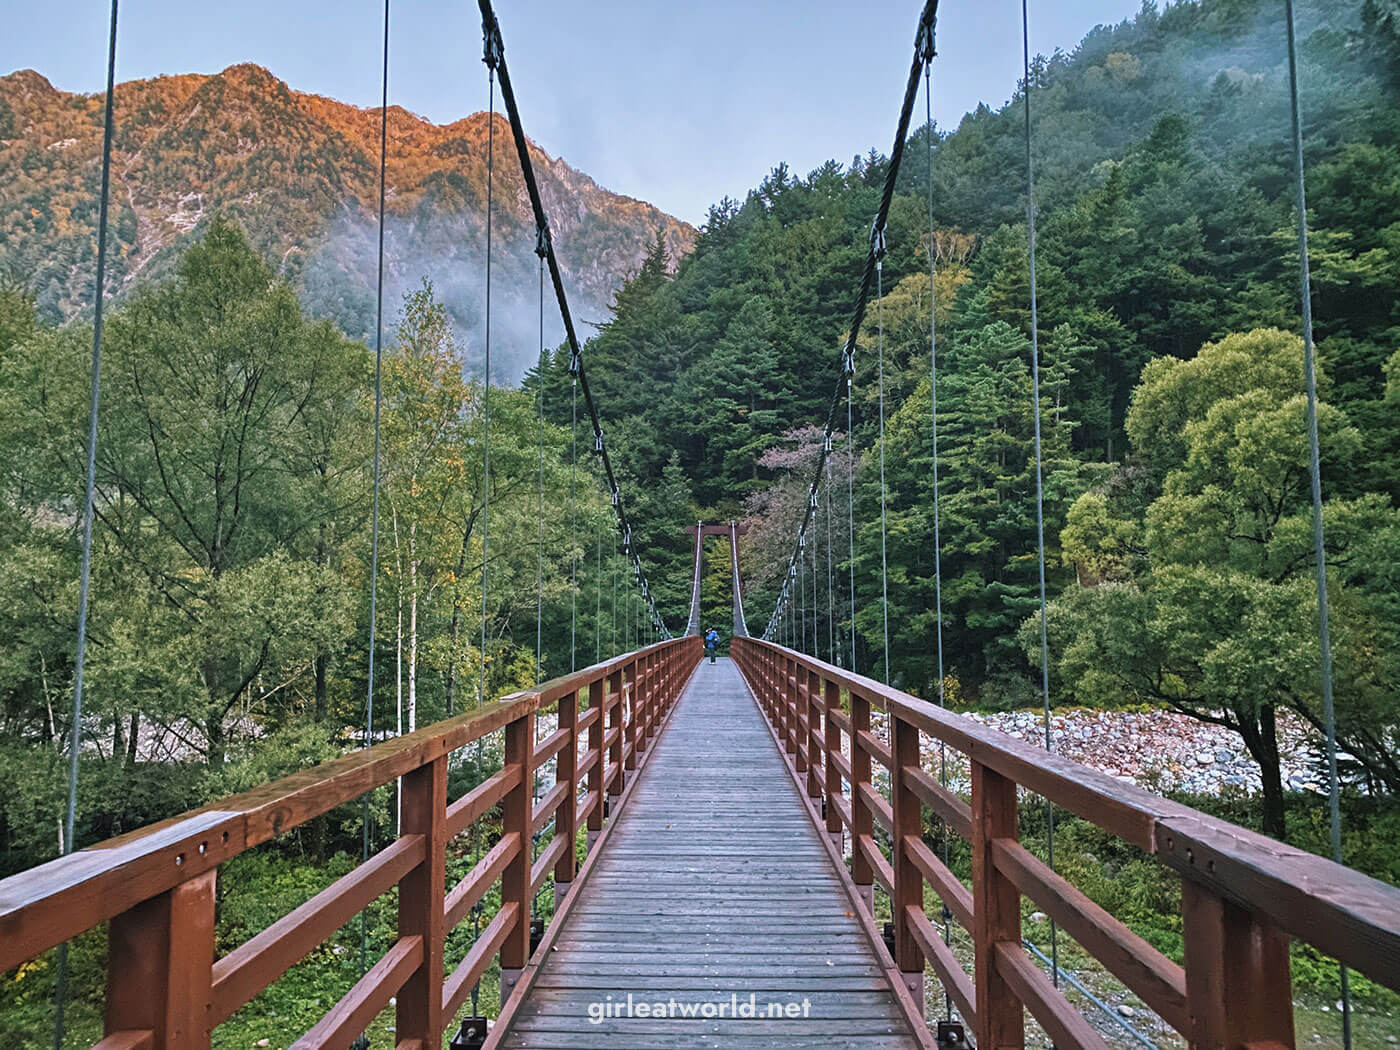
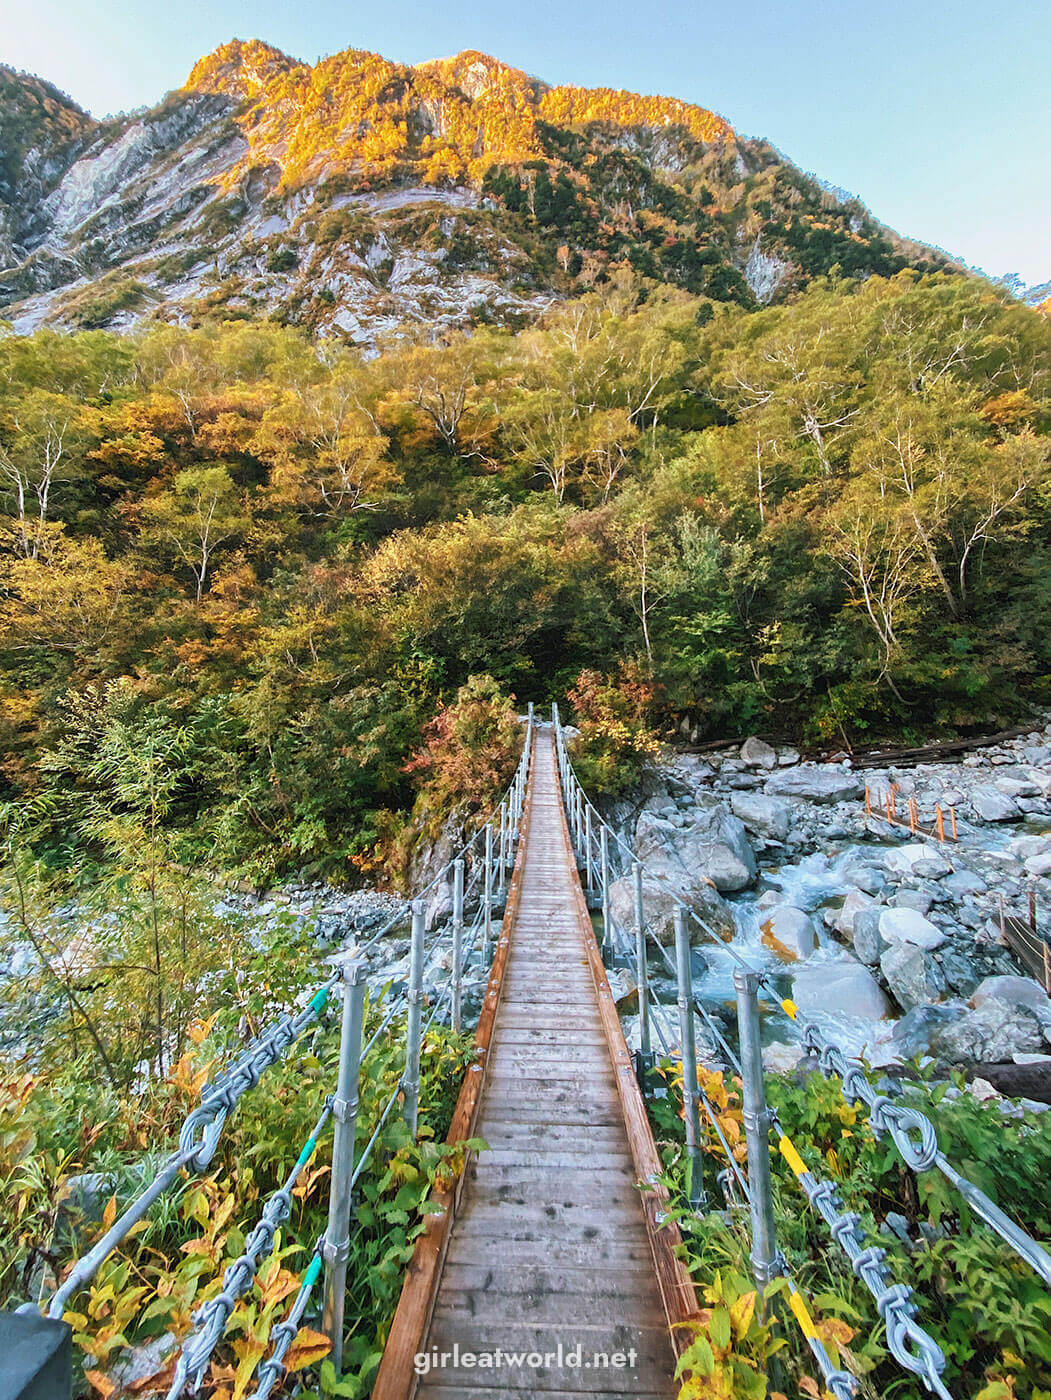
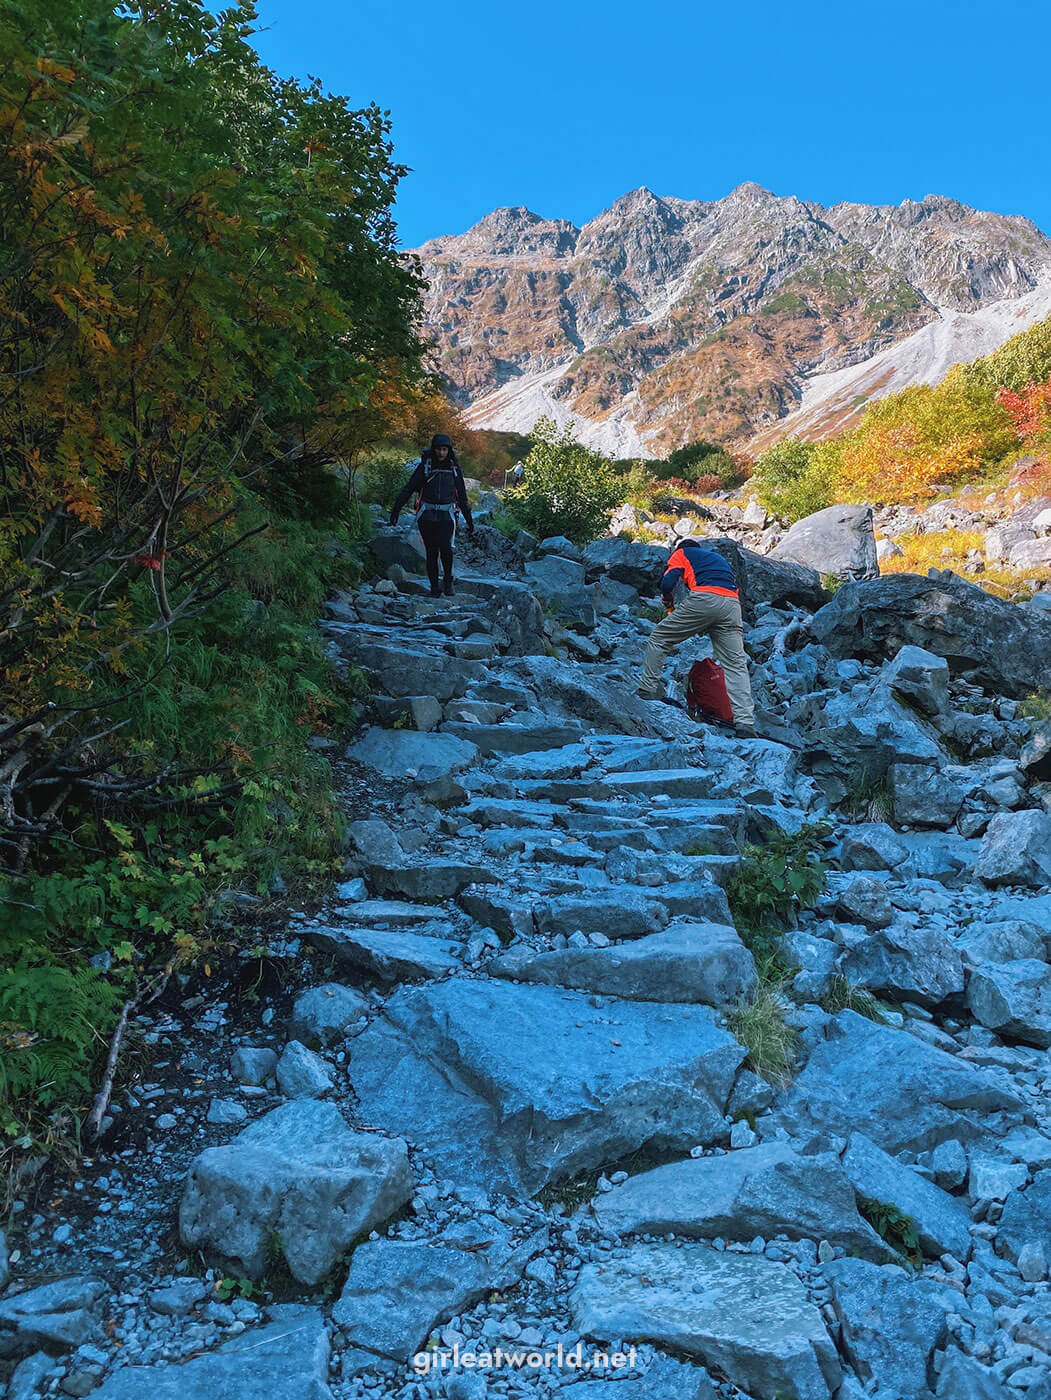
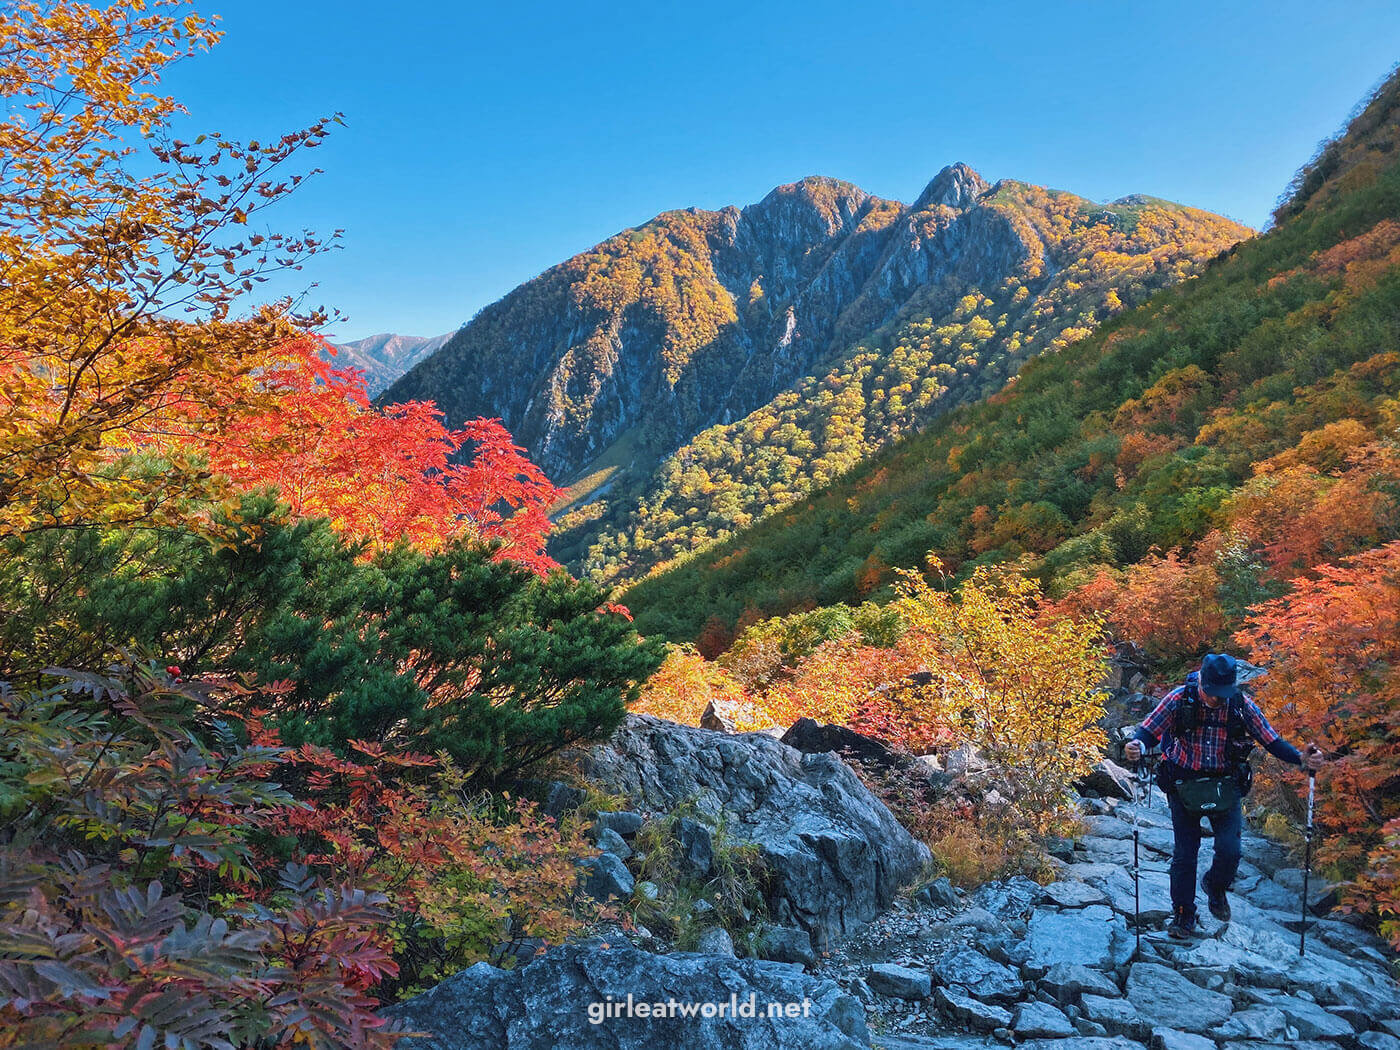
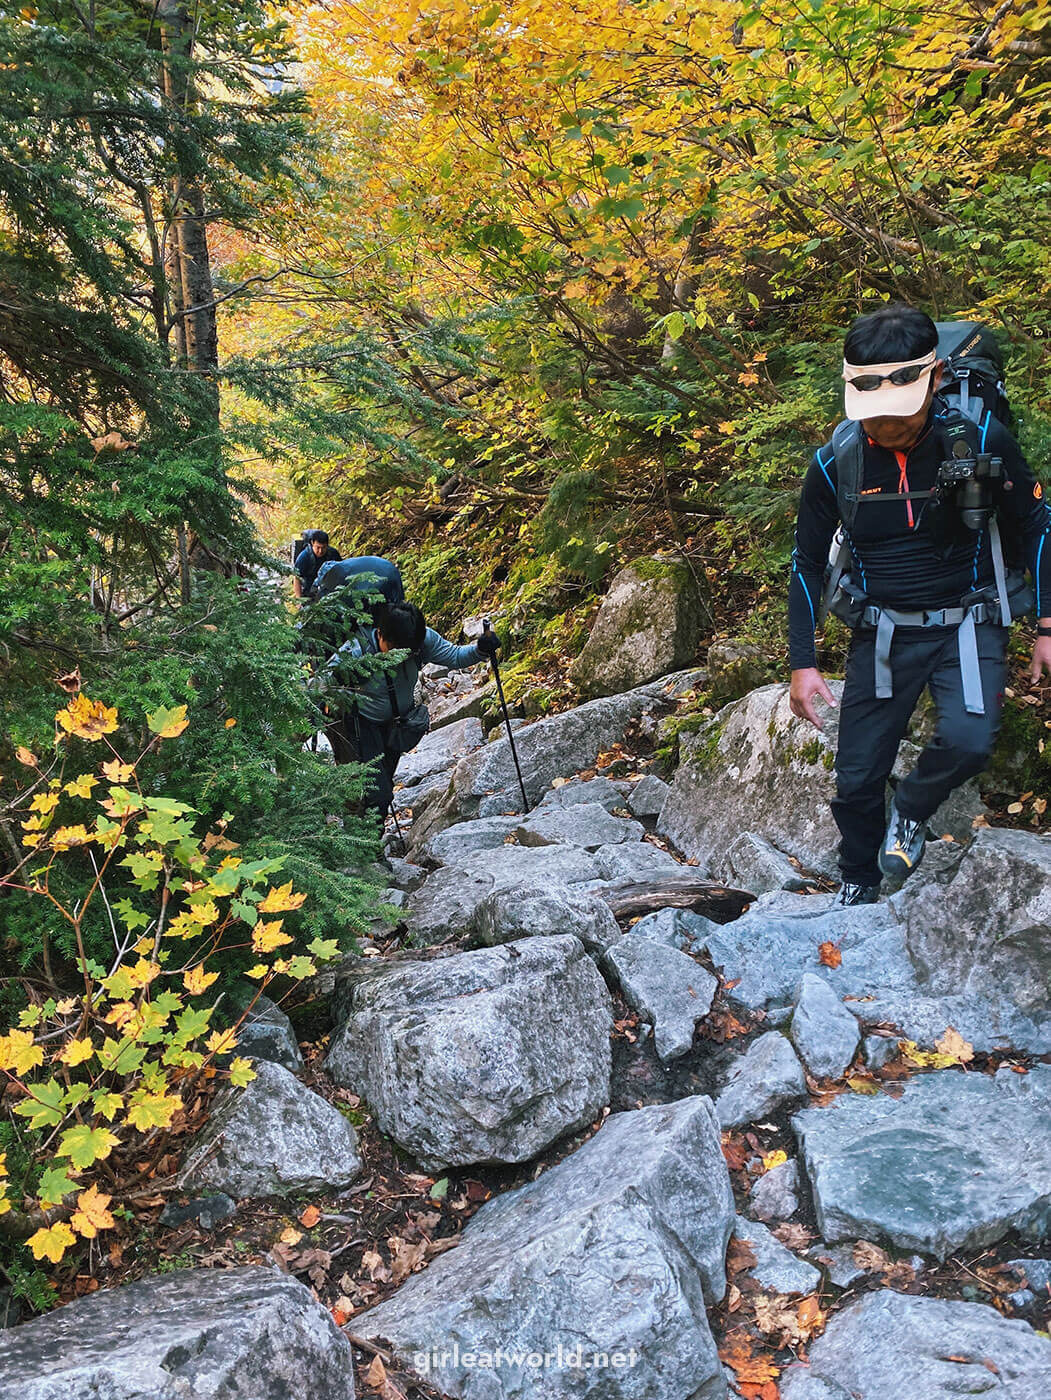
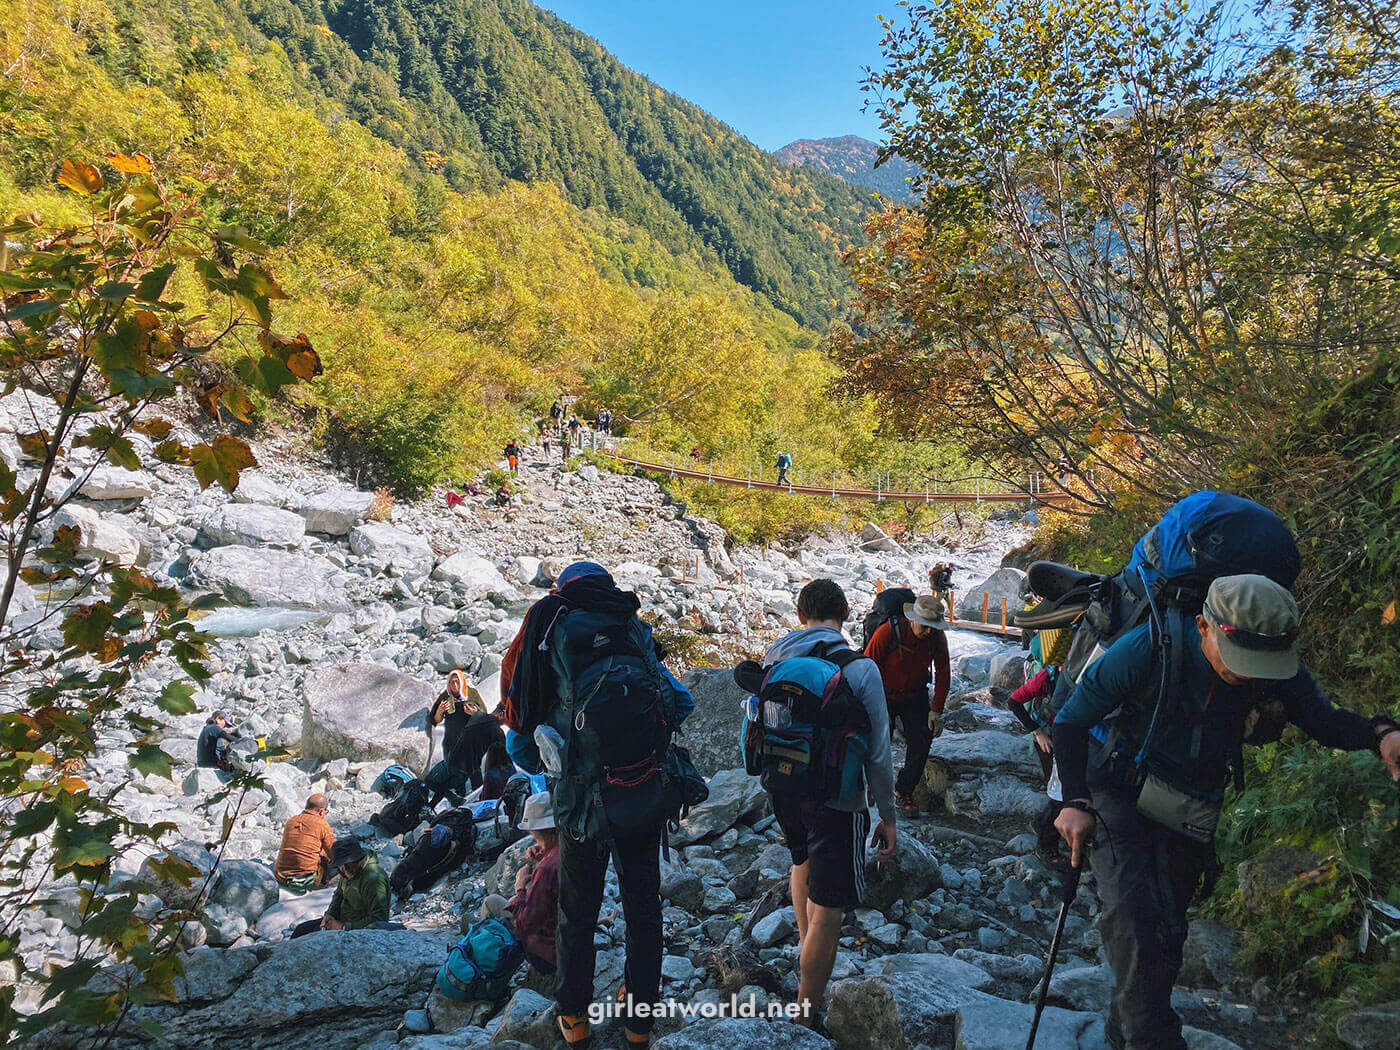
After exactly an hour of hiking at 6:30 AM, we encountered our first mile stone – a swing bridge called Hontani Bridge. Take note of this, because this is the marker of when the trail starts going uphill and way harder. It wasn’t even a progressive change – it just suddenly started going steep, as if we were climbing stairs made of rocks the entire time.
The next two hours of the hike continued to be steep, with a few flat breaks. It’s only about 2.4km from Hontani Bridge to Karasawa Hyutte, but the elevation gain is about 700m. It’s a very worthwhile climb though – the view just keeps getting more and more beautiful as you get higher.
Finally, we reached Karasawa Hyutte at 8:25 AM, just under the predicted 3-hour hike. We stayed around the lodge for 40 minutes, having our second breakfast and watching the view from the hut. There is an open area with tables and benches you can have your meal from – I highly recommend spending most of your time here. They also have an eco toilet which you can use, but as with any eco toilet it doesn’t smell very good. Don’t forget to bring your 100 yen coin too, as a donation for the toilet maintenance.

From here, you can continue on for longer hike and reaching the peaks of some of the mountains, but we did not have time since we only allocated 2 days for this hike…
So back down to Kamikochi we go! We left Karasawa Hyutte at around 9:10AM. The path back down was faster, but descending is never easier for me. By this time there are more foot traffic. More people trying to go up at this hour because they either started early from Kamikochi or they just started later than us from Yokoo Sanso. If you’re planning to do this trek, definitely go early since it’s a popular trek!
While descending, we also came across the four older Japanese women group we had breakfast with. By the way, I am never going to underestimate Japanese elderly people anymore. Initially, we thought we could beat the estimated hike time because the majority of the hikers on this route seem to be in their 60s or 70s, but we were SO wrong. They are just as fit as me, if not fitter!
When we finally reached Hontani Bridge again, I could not be happier. Because I knew that beyond this bridge, what awaits is the flat, boring, drama-free trail. Just what I needed!
But it’s worth noting that when the river is not flooded, Hontani bridge is also a popular resting place, since people can easily access natural water and sit around the rock while recovering. But it also makes for quite a congested traffic, as you can see from the photo below.
We made it back to Yokoo Sanso 2.5 hours later at 11:50AM. The view from Yokoo Sanso is definitely much better today, compared to the foggy view yesterday. I’ll put both here for comparison purposes – I made sure to take them from the same angle!
After a quick 30 minutes rest, we continued our way back to Kamikochi. Similar to Day 1, the trail back from Yokoo Sanso to Kamikochi remains quite a boring trail. I suppose Day 2 is slightly better because it was such a good day though, so I was able to take more photos!
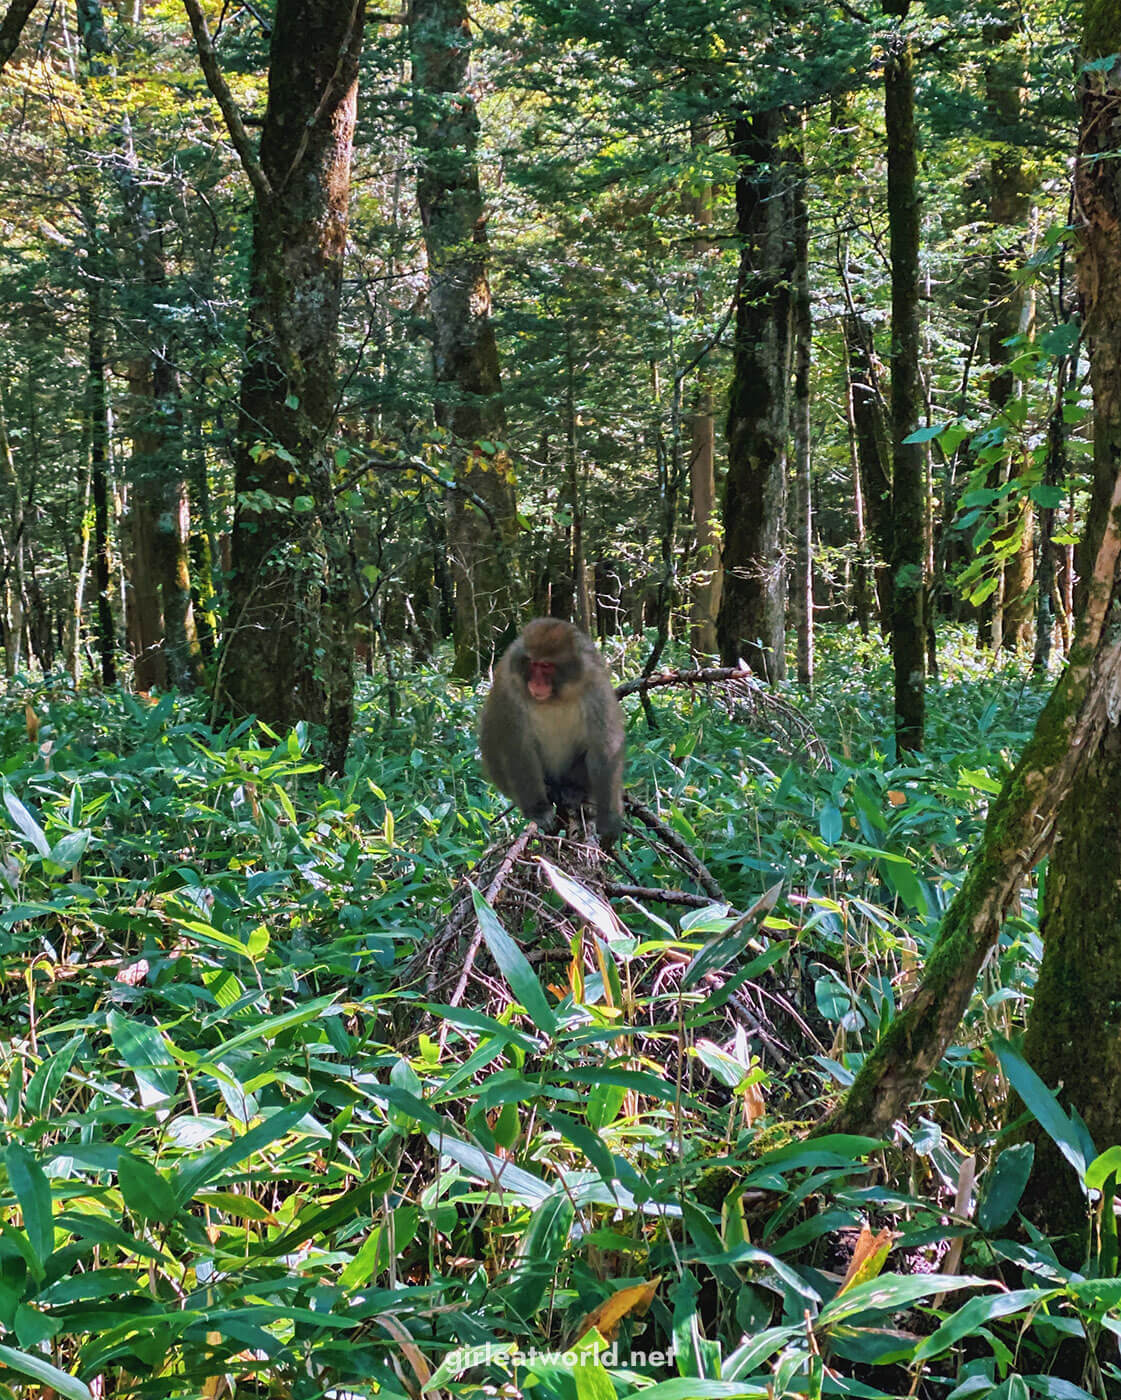
I guess because the weather is so good, more wildlife decided to come out, but thankfully no bears. We saw a flightless bird, a brown/white squirrel-like rodent. We met a gang of Japanese Macaque (pink-faced monkeys) in the forest just before Tokusawaen Lodge. I was honestly scared of monkeys – they are known to be aggressive, but thankfully nothing bad happened!
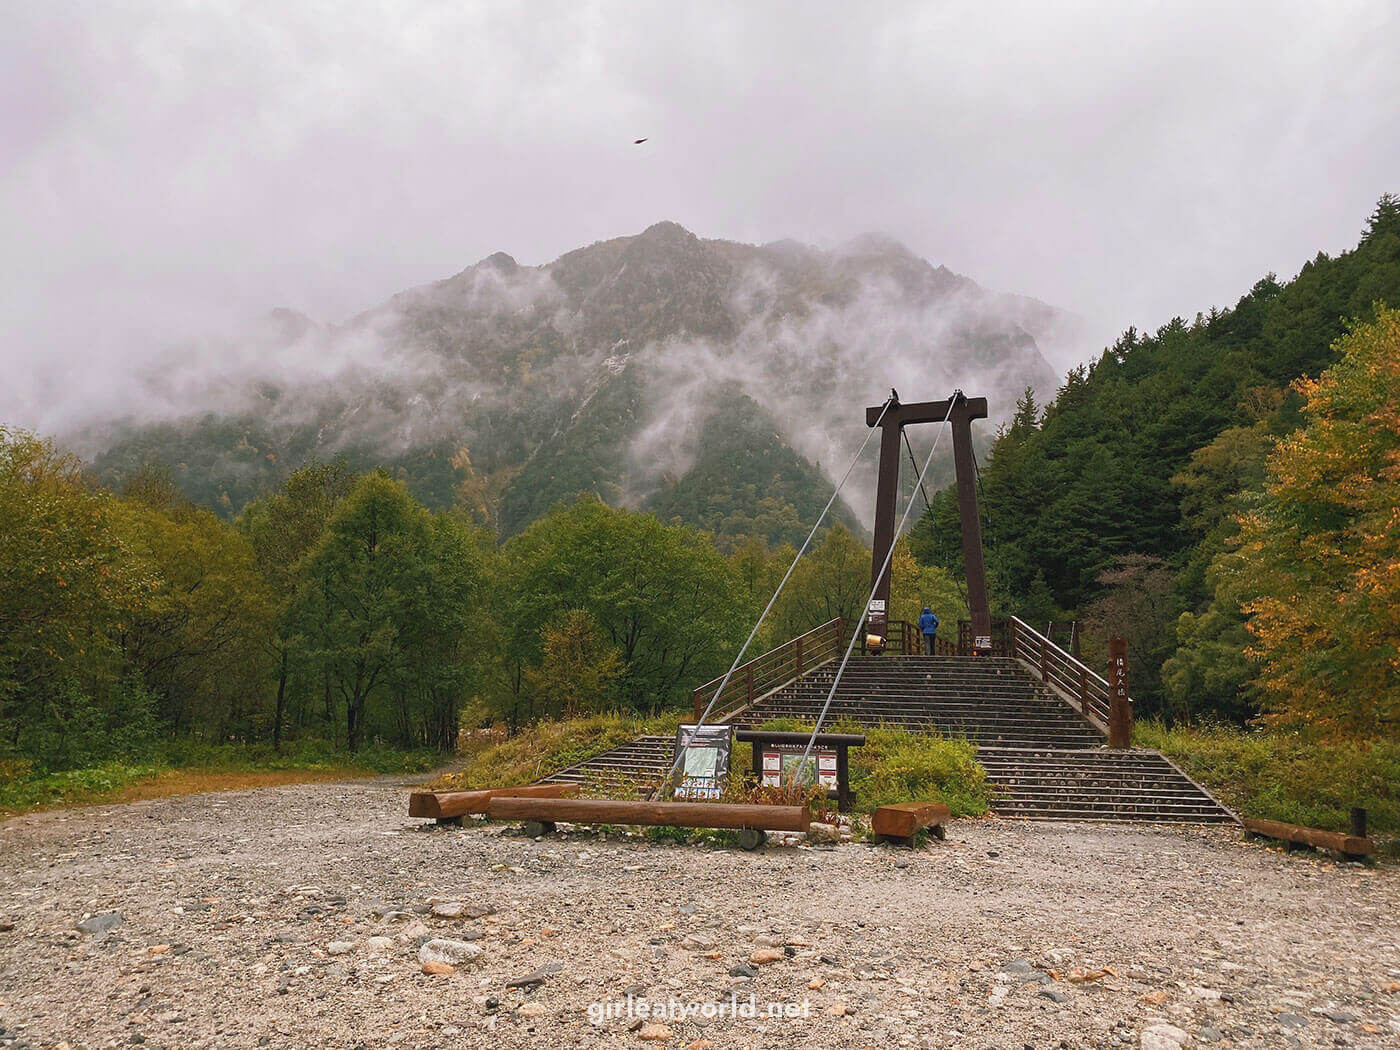
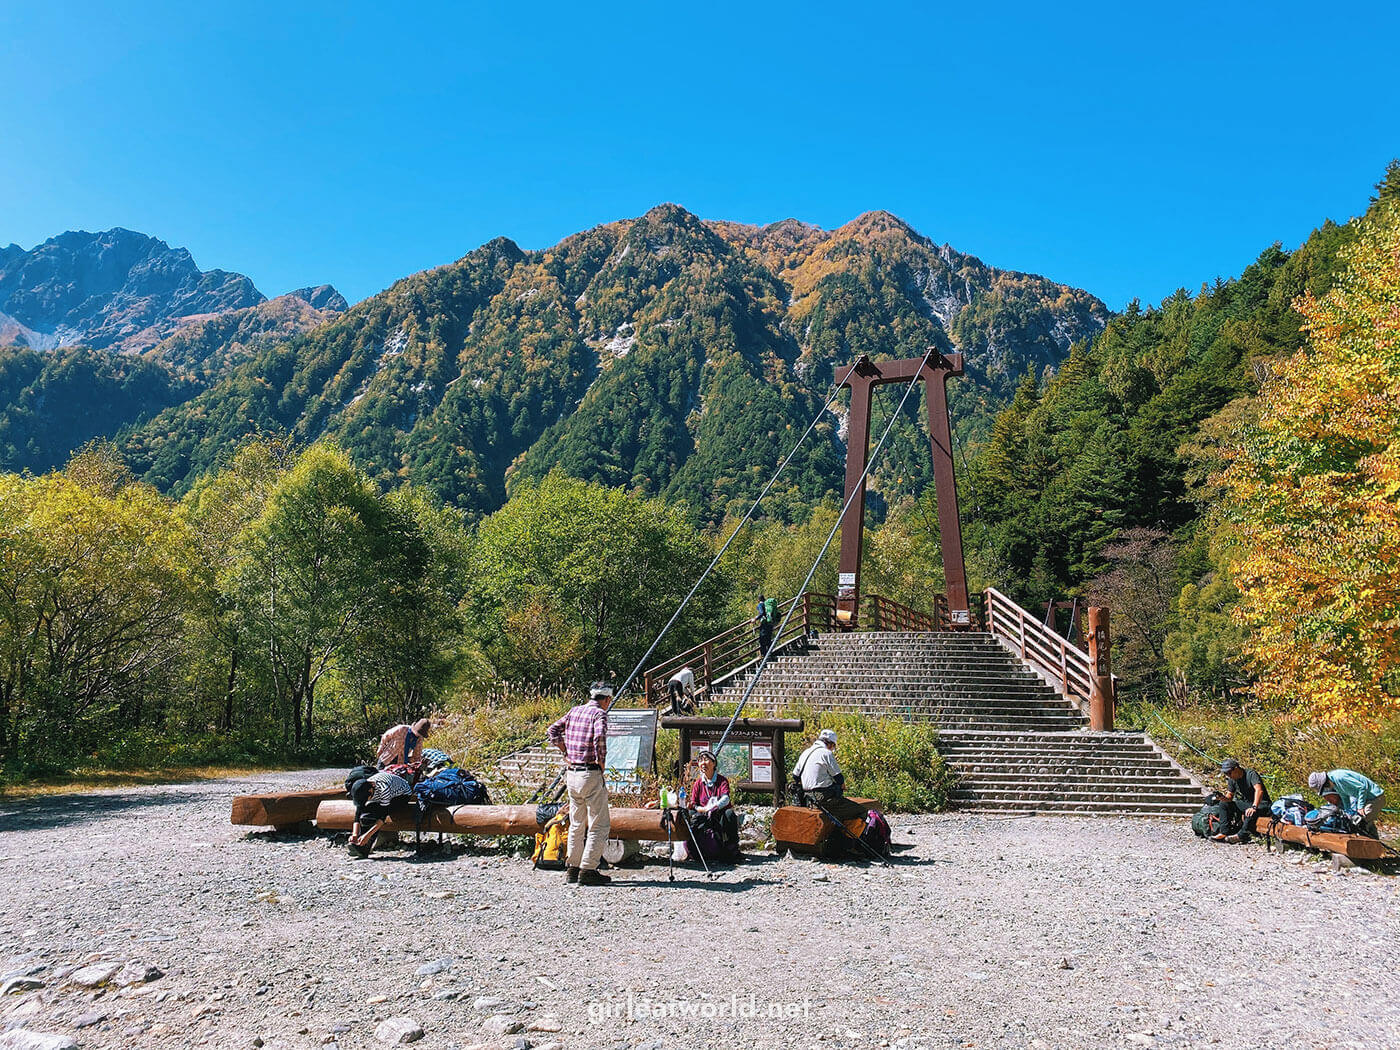
At 3:30PM we finally reached back to where we started, Kappabashi. To my delight, the conditions stayed clear and the bridge looked a lot more beautiful than the previous day when it was all foggy and rainy!
This is the very view that sold me to visit Kamikochi. So you can imagine how happy I was to see the view on a totally clear blue skies day. This place is actually easy to get to – it’s only 10 minutes walk from the Kamikochi bus station. So why did we spend 12 hours walking past this place (and then back)? Well… i’ve had Karasawa Hyutte marked on google maps for awhile and everyone was going there for autumn leaves, so I didn’t want to FOMO.
Anyway, upon reaching Kappabashi area, I immediately went for the soft serve ice cream that is sold nearby the bridge. And I kid you not… it was THE best vanilla soft serve I’ve ever had. I’m not sure if it’s only because I was tired from the hike and I had been thinking about this soft serve the entire way back…
After taking some photos, we headed back to Kamikochi Bus station and caught the 4:05PM bus back to Sawando Bus Terminal. And with that, my Kamikochi hiking trip came to a very happy ending.
Anything else I need to know about Trekking in Kamikochi?
Japanese hikers are some of the most polite hikers I have ever met. Greeting each other as you pass someone by the trail is a must! Here are some Japanese phrases that might help you:
- Ohayo – Good Morning, to be used before noon.
- Konnichiwa – Good Afternoon, to be used around noon.
- Ki o tsukete – Take care of yourself / be careful.
- Ganbatte – fight on / Good luck!
And that’s all I have to say about the Kamikochi hiking experience. If you have any questions, please feel free to comment below. I usually answer pretty fast and to my best knowledge.
Thank you for this info! This is just so perfect for my upcoming trip this November! 😭😍 I’ll be staying in Richmond Hotel Matsumoto but still thinking of getting a stay with a great view.
Hey Mich, sorry I missed this comment before! Thanks for taking the time to write me a comment. When in November are you going? Take note Kamikochi is only open until mid November.
Hi .. do you know if the Karasawa Hutte is still open in the first week of November ?
May I ask how did you book the huts since they take in orders via phone and it’s challenging for foreigners to do so.
Lastly, do you know if the foliage colors still remains till 1st week November ?
Hey SP, Kamikochi is open until 15 Nov. For the huts, you can only book through phone so best to ask a Japanese speaking person to do that for you. I asked a friend to book for me. The foliage color can’t be predicted because it depends on the temperature. If its cold, autumn foliage will start earlier. If it’s a warm year, it may be delayed.
I just checked again and it seems for Yokoo Sanso you can reserve online now: https://www.yokoo-sanso.co.jp/english/reservations/
Hello, I was directed to your website and it is very very helpful. I am planning to visit Kamikochi in April when it opens and I have some questions about the hiking and snow/ conditions. I aim to arrive at Kamikochi on April 17th when it opens. I really would like to do a 3-4 day hike and stay in huts. I am an experienced hiker with very good fitness levels so I enjoy a challenge. I haven’t spoken with anyone that has visited in April time!
– Will Mt Yarigatake hike be inaccessible due to the snow? Would it be too dangerous?
– Would other hiking trails be better such as The Panorama Ginza Trail or Mt Hotaka? Could you provide a bit more information about difficulty levels and if it is ok to do these in April?
Any advice would be really appreciated!
Thank you
Hey Claire, I’ve only done the trek to Karasawa Hyutte in october, so I don’t know the answers for your questions firsthand. However, I find that the Kamikochi official site would periodically post updates about hiking trails closer to their opening date, maybe you’ll want to check them https://www.kamikochi.org/
Generally speaking, April should be good time to go as the snow should be gone by then. I would also check if they are indeed open on April 17 this year, as the opening day varies year to year
Hello Melissa,
Your blog is very useful. I am planning to visit Kamikochi and hike to Karasawa Cirque. I will stay one night at Yakoo Sanso and one night @ Karasawa Hutte. The question is how I can book bunk bed at Yakoo Samso and Karasawa Hutte. From their Websites, they require a booking through a phone call. I live overseas and cannot speak Japanese.
Please advise
Apple
Hey Apple, unfortunately they only take reservations via phone call. I suggest asking your accommodation in Japan to see if they can help you with the communication.
Hi,
Thank you for your wonderful blog. I am going to hike Karasawa Cirque in 10 days’ time.
Since all the huts have been fully booked by the time I started planning this hike, I will camp instead.
Do they have camping items for rent at the campsites along the trail? I will bring my own tent.
Thanks for any advise.
Montana
Hey Montana. I don’t recall seeing place that sells camping gears when I was there
Thanks a really helpful guide for what we’re planning this November.
Which month did you hike? Thank you!
hi gracia, it was first week of october!
Hello Melissa,
I enjoyed reading your blog. I was actually looking for the Kamikochi – Karasawa Cirque hike and add ‘pregnant’ in the search bar. haha! I’m 4 months pregnant now and we’re planning to hike Karasawa Cirque on October but I’m not sure if that’s doable since I will be 7 months pregnant that time. We went to Kamikochi 2 years ago, but just until the Myojin bridge, but this time, we’d like to continue the hike until Karasawa Cirque. Based on your experience, do you think it’s going to be possible for me to hike until there or should I rest instead hahha! Thank you and more power! BTW, my OB gave me a go-signal for hiking – now that I’m 4 months pregnant .. I’m not sure if this will be the same for carrying my 7-month baby bump.
Hey Iyey! It really depends on you! Are you an active person now and before pregnancy? For me, I thankfully had a really easy pregnancy and was able to keep active throughout – I can’t say the same for myself now lol.
The trail to Yokoo Sanso (where you can stay overnight) is flat and easy, much like the trail to Myojin Bridge. I think if at 7 months you still feel good and can do long walk, it won’t be too much of an issue. However, beyond Hontani swing bridge, it gets steep really quick all the way to Karasawa Hyutte. It’s steep climbing non stop for 2 hours. Then on the way back down, you have to go back the same route, which means you need to be extra careful descending.
It was pretty intense, though looking back I am so glad we did it. It was so beautiful! Even in early october (when we went too) the autumn leaves had turned colorful. And with a toddler now, I don’t know when we will get the chance to do overnight hike again. So no regrets from me!
Hey Melissa, thanks for such a beautiful write-up! Super keen to explore Kamikochi and tackle the 2-day hike. I was wondering if you knew where travellers might be able to store their larger pieces of luggage near Kamikochi Bus Station? Ideally we won’t be taking our luggage with us on the hike! Thanks in advance for your help 🙂
Hey Marina, yes there is a baggage room at Kamikochi bus station. See here: https://www.kamikochi.org/spot/kamikochi-bus-terminal
There is a baggage room (tel: 0263-95-2034) on the first floor of the Kamikochi Bus Terminal, but there are no coin lockers. Rates are by the day. Small: ¥350 / Medium: ¥400 / Large: ¥500 (¥600 for oversize). Bags can be stored overnight, but the office is only open from 6:00 a.m. to 5:00 p.m.
This article was handy as it told about ways through which a good trip can be planned. I am sure one would be looking for such an article, and here they should go. I am just amazed to see this.
This was so interesting to read. Now I want to go to Kamikochi so so bad. You did a great job to explain it. I am guide in Komodo National Park and love it here. If you ever come you should write up about it like this. That could really help tourism for my local people. Much love – Jejey
I am really tempted to do the 3d2n hike up to Karasawa but am worried if I can make it up the rocky stretch because I am considered a beginner in hiking. Would you recommend the route for beginner?
Hey Jerm. I wouldnt say i’m a very experienced hiker myself. I don’t think it was too difficult, though it was not easy as well. Since you are doing 3d2n you have a lot more time than I did, so I think you should be ok!
I was looking for the perfect travel guide, and thankfully, I guess I’ve come to the right spot. This travel guide has helped me in my endeavor to travel, and I hope to find more stuff like this!
Great informative blog.
We just did the French Camino hike and thus fascinated with your description.
thanks KC! Hope you had fun at the french camino?